6 Tips For Choosing a Yoga Teacher Training

IMG_7129.JPG

After recently completing my 300-hr YTT and receiving several questions from people asking for advice on how to pick a training, I thought it would be best to share my answers in this blog post!

If you google the words ‘Yoga Teacher Training’ an endless amount of information will emerge. You will find trainings offered from places all around the world with courses from 2 days to 2 year intensives and even online programs. Technology is a powerful tool for research and discovery, however, it can be extremely overwhelming when you are looking to invest your money, time and heart into the best training for you.

There are many factors to consider when choosing any training…

Below are some key aspects to consider when choosing your yoga teacher training. I share this from a personal experience after doing intensive research for both of my YTT’s and hope this helps you to begin your journey.

  1. Decide on a style of yoga

    Hatha. Yin. Ashtanga. Restorative. Vinyasa. Kundalini. Power…

    These are just a few examples of the most commonly practiced, but the list is endless: yoga comes in all different shapes and styles. Usually what you’re exposed to in your regular yoga practice or studio, is what you will naturally be drawn to for your training. Keep in mind that the practices we avoid may be the most nourishing for our bodies and minds. For example, if you practice power vinyasa without a consistent pranayama or meditation practice, you may be adding tension and stress to the nervous system through too much intensity. On the other hand, if your daily practice is more restorative, you may be lacking the energy, agni (fire) or strength that a heating pranayama or asana practice can bring.

    The key in any thorough teaching training is balance, just like in our yoga practice. Look for a YTT which is integral and will include different practices and experiences.  

    * If there is a specific type of yoga you know you would like to specialize in then my recommendation is the same. For example, look for a training which specializes in 'Yin' (or whatever your interest is) which encompasses multiple teachers and is well organized so you can see the breakdown of the content taught. 

  2. Research the training

    I recommend a training which includes multiple teachers, as each teacher has their own unique capabilities. Often these trainings will bring together a group of teachers who have a common ground for their foundation, however, they will specialize in certain areas - therefore they can convey less information to you, more effectively. For example, an asana teacher can understand anatomy from sensation and intuition, but may not be able to translate it into anatomical terms. Hence, the importance of an anatomy teachers influence and experience specifically in this field.

    Most importantly, each teacher will bring their own unique life experiences and perspectives which are a blend from their previous teachers (and their teachers, and so on!) so that you are essentially learning from many generations. 

  3. Educate yourself on Yoga Alliance

    Yoga Alliance is a non-profit association representing yoga teachers, schools and studios world wide. Yoga Alliance has compiled a certain amount of requirements in order to become 'registered' under their qualifications. YA has become an internationally recognized organization and has helped to create a standardization of trainings. When you take a training recognized by YA you will be certified under Registered Yoga Training (RYT), which will give you traditional and practical education and allow you to teach worldwide.

    For example, each 200 hour yoga teacher training which is registered under YA will include:

    100 hours of Techniques, Training & Practice: traditional yoga techniques (asana, pranayama, meditation, kirtan, mantra, kriyas, chanting, etc.)

    25 hours of Teaching Methodology: communication & business skills, demonstrating, assisting, observation, etc.

    20 hours of Anatomy & Physiology: physical bodily systems, energetic bodily systems, etc.

    30 hours of Philosophy, Lifestyle & Ethics: traditional texts, such as the Yoga Sutras and Hatha Yoga Pradipika, student relationships and community, understanding the value of teaching yoga as a service to others, etc.

    10 hours of Practicum: practice teaching, observing and giving feedback, etc.

    These are the most basic and necessary tools you will need to teach. You don’t need to understand it all from the beginning (most teachers will tell you that it takes years to integrate fully!) but it is important to set up a strong foundation from the beginning. 

    *Keep in mind there are many trainings that are not RYT (Registered Yoga Trainings with YA) and may be as in depth and thorough - YA is simply the most internationally recognized and if you plan on teachings in studios, many will require RYT education. 

    Want to find a registered yoga school? Click here.

  4. Research the teachers of the program

    Although it isn’t necessary to know the teachers or instructors before you commit to their trainings, you may find it extremely helpful if you, or a friend has practiced with them before. This will give you a sense of security knowing that the teacher who you will be studying under is genuine and qualified. Before deciding on my 200-hr YTT, I took a few classes at a local studio in which I was interested in doing my training at. This allowed me to get to know each of the teachers and their teaching style better. However, for my 300-hr YTT in India, I signed up for the course without personally having met or taken any classes from the teachers beforehand — because of this, I made sure to thoroughly research and check out online reviews from the program. If you’re looking to do a training abroad, I’d recommend reaching out to the training leader, one of the teachers or program manager to see if they can help you with any questions that you might have.

  5. Decide on a location

    Go with the training that speaks to you. Trust your intuition and follow your heart. 

    Give yourself adequate time to research and narrow down your options depending on what type of environment nourishes you. Do you learn better when you are in a more disciplined atmosphere? Do you need a location which will enable you to stay in touch with family or friends? If you can take time away from your every-day routine and life (work, internet, daily responsibilities) then I highly encourage you to do this.

    A training should create a space which will aid you in the purification process. 

    Give yourself this 'time out' and encourage yourself to be off the grid. Disconnect to reconnect. Part of the challenge and experience of a YTT is traveling to unknown places, both physically and mentally. For many, to complete a training outside of your normal context of life and comfort zone, can help to create more focus and immerse yourself fully. Ultimately, every ones situation (due to work, children, school, finances) will be different, so choose the training which feels right for you at this moment in your life.

  6. Get involved in the yoga community

    The internet is always available and at our fingertips, but the best thing you can do is get involved personally in your local yoga community. Explore multiple studios/teachers and get to know as many like-minded people as possible. Reach out to experienced teachers and other students who can give you recommendations on teachers and courses they have done in the past. If you are hesitant, treat yourself to a weekend workshop immersion or yoga retreat before signing up for a YTT to experience what it feels like to immerse yourself in the practice.

Frequently Asked Questions:

  • Q: I am new to yoga but I am interested in taking a training, can I?

A: Of course! There are trainings for all levels, beginners through advanced. A 200-hour Yoga Alliance training is a good place to start. Many people decide to take a YTT simply to further their own knowledge for a self-practice and never intend on teaching. This is completely normal. If you have a strong desire to further your practice and are open to a new experience you will be welcome into any training.

Immerse yourself wholeheartedly in the experience and don't look back!

  • Q: What advice would you give someone interested in taking a 300-hr training?

A: Develop a strong personal practice if you haven’t yet already. Teacher training, especially an intensive 300-hr taken over the course of a few weeks, tends to be physically and emotional demanding. Yoga practice is often twice daily, with a third practice focused just on teaching methodology. Therefore, it's best to go into training with a strong personal practice so you can physically be ready for the training. Having already practiced for four years and teaching for a year before taking my second teacher training, this personally helped me feel more prepared. However, there are no requirements for taking your 300-hr training, other than already having your 200-hr certificate.

  • Q: How can I make the most of my experience at YTT?

A: Take lots of notes. Decide what your best method of note taking is and stay organized. Using a laptop or tablet is a good option if you want to share your notes and you like the convenience of easily adding and deleting information. If staring at a screen doesn’t work for you, a notebook or journal might be better. The important thing is that you have a way to record information that you can reference both throughout your training and after.

If your instructor is okay with it, make audio recordings of the asana-based classes so you can study the cueing, pace and language.

One useful method to enhance your teaching skills is to take a video of yourself when you’re doing your own home practice. Talk through your sequence out loud as if you were teaching.

When you replay the video, try turning your device face-down and simply listen. Students won’t always be watching and you won’t always be demonstrating, so your words need to be clearly instructive. Try practicing along to just the audio to see if your instruction still makes sense.

Keep in mind that your style of teaching will take time to develop and will evolve over time.

Make lots of friends. Be open and available to connect with the other students in your training. More than anyone else, they will know what you’re going through in the process and will be supportive of your breakthroughs… and breakdowns! The community that you connect with during your program can turn into life-long friendships and usually these friends are key for an awesome training (and life) experience.

Find balance. More than learning how to correctly sequence classes, develop cueing technique and refining your hands-on adjustments, yoga teacher training is a transformative experience both on and off the mat. You learn as much about yourself as you do about the practice so be ready for a shift in perception as you move through the course. Set up some time for yourself every day for quiet reflection, and when you need to engage in self-care: extra sleep, hot ginger tea, massage, epsom salt bath and fun things (non-yoga related) to let off some steam like running, dancing, or spending time in nature. All these things will help you stayed balanced, grounded and allow the transformation to go more smoothly.

  • Q: What is the AVERAGE price for a yoga teacher training? what should i look for in terms of quality?

A: Tuition for a yoga teacher training program can range anywhere from $2,000 to $10,000, depending on the program. There are a variety of factors that influence pricing including the experience of the instructors, the quality of the instruction, the location and the business model of the program.

It’s always a good idea to research or ask about the experience of the teachers when you’re looking into a program. Ask for the years of teaching experience, the types of certifications held and when they were certified.

Another consideration is the quality of the instruction. This is partially influenced by the experience of the teachers, but you will also want to consider whether the course has any evaluation components. For example, is there a practicum assessment at the end of the course, confirming that the skills and information have been assimilated by the trainee? Although this may sound intimidating, it often leads to a good training experience. Also try to figure out if the teachers are available for questions outside of the training and what recent graduates have to say about their experience.

Lastly, it may help to find out the number of students & instructors in the teacher training class. Larger programs can have 30-100 students in a training. Often the business models of less expensive certification programs tend to sell as many registrations as possible, without regard for the quality of the instruction. You will have to decide if the experience of a large training class is acceptable or if you may want a more personal experience. Regardless, when researching programs, you should ask about the typical class size and the instructor-to-student ratio.

And if you’re still totally overwhelmed… it will all be okay. Trust me, I’ve been there!

As with any subject you study, the first lessons are an introduction. Your first teacher training can resemble the tiny tip of an iceberg which leaves you feeling inspired and excited to explore the rest of the iceberg. It’s an endless journey and one that will always evolve depending on the phases of your life. 

An intensive training course can also leave you feeling overwhelmed, as you are suddenly opened to new philosophies and ways of living. It will encourage you to take a closer look at your current life (relationships, habits, patterns) and become aware of what is inhibiting or nourishing you. The deeper into the yoga journey you go, the more sensitive you become as your awareness moves from the physical to subtle. Remember that everything we need to know is with us at this moment and that our lives are unfolding in perfect timing. You will absorb whatever it is you are meant to learn/take away from an experience in life (or training course). Trust that with steady practice and a burning desire to awaken your true self, the more the knowledge will sink in and begin to trickle off the mat into all aspects of your life. 

I guarantee that your first teacher training is definitely not your last!

So relax.

Breathe deep.

Enjoy the journey and don't rush the process. 

Stay present to the beauty of being a student and know you are continually learning and growing. There is no 'perfect' yoga teacher and no 'perfect' training so do your best to choose teachers and a training that inspires you in this moment of your life and let go of the end result.

Walk into any training (your first or fifteenth) with a beginners mindset... 

Release any expectations and know that any YTT you do will be physically, mentally and emotionally challenging, yet 100% transformational. It will open your eyes to a new way of living. It will help you travel deep within, past your ego and external attachments. It will lead you to reveal the most happy and healthy version of yourself... and ultimately guide you to be of service to others by sharing this positivity and love.

IMG_0430.JPEG

Have a question? Reach out to me below!


4 Simple Ways To Practice Letting Go

3A828C95-6996-4DAA-9674-5B526F9A0CBE 2.jpg

I was having a conversation with a friend recently about our biggest takeaway from living in Bali. She shared that hers has been “trust” and I responded to mine being “surrender”… which led me to the realization that these two concepts actually go hand in hand.

Only when we fully trust, can we learn how to surrender and let go.

In the yoga practice, this is called Ishvara pranidhana — to surrender (pranidhana) to God, or a higher source (Isvara). Our old emotional paradigms and unhealthy mental resistance (known as samskaras) melt away when we surrender. It’s believed that this is a crucial step on the path of freedom, liberation and enlightenment — Samadhi, which is the ultimate yoga goal according to Patanjali’s Eight Limbs of Yoga.

Surrendering allows us to fully step into our lives ready to receive, completely able to manifest and willing to embrace everything—the good, the bad and the unpredictable—with an open heart. It’s from this place of trust where real magic happens.

I’m still learning how to live between this balance of effort and ease. I don’t think letting go is something that just happens automatically or clicks in one day. I think it’s something that requires conscious effort, practice, patience and most importantly, trust. We will continuously be challenged and tested on our ability to gracefully surrender throughout the course of our lives.

One of the biggest key principles for letting go is learning how to be present so that we can be mindful of our emotions when they arise. When I sense fear getting the best of me, I try to remember to surrender to love. When I release my resistance to love’s presence, I am able to receive what I need — what’s trying to come into my life at that exact moment, for my highest good.

I think of letting go as diving in, not turning away. As living in each moment, getting as close to a full life experience as possible in this one moment. To do that, we need to learn how to let go of what isn’t ours to hold onto forever. Here are a few simple and realistic ideas that can help.

HOW TO LET GO: 4 SIMPLE AND FOUNDATIONAL PRACTICES…

  1. Acceptance First.

    At its core, an attachment is about not wanting something to be the way it is. It is resistance to reality and it’s hard to change what you never acknowledged needed changing in the first place. You may want something in your life to be different, but you need to honor what is, for what it is, first.

    Fight what is, and it will fight back. Try to rush your healing with angst rather than curiosity and it will hold you back.

    Over and over, acceptance is the practice of opening and investigating the moment with curiosity, courage and deep breaths.

    Letting go doesn’t mean you resist or avoid, just that you don’t get attatched to every passing thought or moment that occurs.

  2. Awareness.

    Through awareness, personal growth and intuition we can invite surrender in when it comes knocking. It’s a choice made in the present moment. Seeing reality for what it is and opening up to it wholeheartedly. Start by paying close attention to your feelings and your actions that follow.

    Your feelings aren’t random, they are messengers.

    When we feel worried, we are tightly attached to how we want things to be, rather than relaxing into accepting whatever might happen when we try our best.

    When we feel frustrated with someone, it’s because we’re attached to how we want them to be, rather than accepting them as the wonderful flawed human they are.

    When we feel stressed and start to procrastinate, usually it’s because we are attached to things being easy and comfortable (like distractions) rather than accepting that to do something important, we have to push into discomfort.

    And so on.

    When you bring more awareness to your feelings and actions you can learn directly where in your life requires a little bit more trust and letting go.

  3. Meditation.

    Paying attention to the present moment creates space around the thoughts floating around in your head. Meditation is one of the simplest ways to practice this. There are many different meditation techniques and apps out there, but you don’t need to overwhelm yourself or make it complicated. Simply find a quiet space to have a comfortable seat and begin to focus on your breath and any thoughts/feelings that arise. You don’t have to erase the thoughts or control them, just keep coming back to your observation of them, your breath or a mantra or other focal point.

    Through meditation, it’s possible to see how we attach our worries, planning and ruminating. We can see how when we entertain and run wildly with a thought, rather than letting it go, we end up creating a story that often doesn’t serve our highest self. We can practice letting go of these attachments by simply refocusing on the present moment.

    Meditation is peace training, space making and a way to lighten the load of everything we’re carrying.

  4. Connect with compassion.

    Compassion is a practice too, a skill that can be built no matter who you are or what your past looks like.

    Try to see every attachment as a call for compassion. In your meditations, visualize an end to your attachments and suffering with compassion and let that loving-awareness evolve into a wish for the end of the suffering of others. As you focus on warming your heart, attachments start to melt and you’re granted a little wiggle room. Your awareness grows. Instead of dwelling on what you’re trying to let go, you focus on loving anyway.

    When you see others’ suffering, your suffering is suddenly not so different or impossible.

    The more we practice loving-kindness, the more we foster compassion and let go of judgement and hostility.

    Sometimes this looks like giving yourself compassion for not being fully ready or able to let go. Remember that this practice takes time and continuous conscious effort. Honor wherever you are currently at on this journey of trust and surrender.

Through surrender, we can move from outer turmoil to inner peace. By letting go of expectations and outcomes, we can transform a painful experience into a positive, transformative endeavor. Through trust and surrender, we become ready to receive, to tap into the abundant possibilities available to us and to manifest a life free from restraint and restrictions.

Which one of these letting go practices could you use the most today?

Tell me in the comments, I’d love to know!

All my love,

Jess

The Power Of Words: How To Use Daily Affirmations

IMG_4949 2.jpg

“What you say always produces some kind of harvest. What is the lasting legacy of your words?” — Paul David Tripp

I can still remember my third grade teacher telling me I was a good writer. At a young age I had never thought of myself that way, at least, not until that very moment. But I believed her when she said it because I admired her. To this day, Ms. Ayala is still one of my favorite teachers. She took the time to encourage me and the words she used had a lasting impact on me that I am grateful for.

Today, writing still plays a major role in my life. From journaling to writing blog posts and now, to working on my own book. I know that my passion for writing stems from those early years in school and from the positive, ingrained words from my teacher. It was because of her that I grew up thinking, I am a good writer. And that affirmation has stuck with me ever since.

I can also remember certain negative words that people have said — both in person and online. Those are difficult to forget as well. I’m sure that it’s easy for you to think of examples, both good and bad, of how someone else’s words have strongly impacted your life.

Words are powerful; they carry certain vibrations. They can affect our mood, self-esteem, personality and overall view of life — they create our reality. As ‘woo-woo’ and pseudo-spiritual as it might sound, it’s been proven true by scientists in experiments such as those conducted by Masaru Emoto — Messages In Water. If you have never heard of this discovery before, I highly recommend you look into it.

There are even studies to prove the fact that words can change your brain.

According to Andrew Newberg, M.D. and Mark Robert Waldman, “a single word has the power to influence the expression of genes that regulate physical and emotional stress.”

People, plants, animals, minerals etc. — all respond differently to words of different vibrational frequencies. That is why it is so important to be mindful of the words we expose ourselves to; the words we use when we talk to others, the words we hear from others (personal conversations, music, podcasts, movies etc.), the kind of words we read (books, texts, blogs, emails etc.) and the kind of words we think of in our minds as well.

Take into consideration that humans have anywhere from 12,000 to 60,000 thoughts per day.

Those are a lot of words, right? So what does this actually mean?

Even more powerful than the words that others say to us, are the words we say to ourselves. We spend so much time inside our own heads. We may not say the words out loud, but they’re there… and they count.

“Watch your thoughts; for they become words. Watch your words; for they become actions. Watch your actions; for they become habits. Watch your habits; for they become character. Watch your character for it will become your destiny.  — Frank Outlaw

If our words and thoughts are the tools that create our reality, then shouldn’t they be considered our most powerful tool yet?

Shouldn’t we only pick the very best words in order to create our very best reality?

Our thoughts also impact what we manifest in our lives. But it can be argued that the real power lies in our words. It’s our words that provide a bold affirmation of our innermost thoughts. They are a confirmation to the world of how we see others, our lives and ourselves. It is this affirmation that our words provide which enables our thoughts to manifest into reality.

What Are Affirmations?

According to Success Consciousness, this is how affirmations are defined:

Affirmations are sentences aimed to affect the conscious and the subconscious mind, so that in turn, they affect our behavior, thinking patterns, habits and environment.

The reason affirmations work is because they’re statements of what we believe, which encourages us to take action on those beliefs.

How To Use Affirmations

There are a variety of ways you can use affirmations. I know there are some people who will find using different techniques more fun and engaging, and there are also people who thrive from routine and need to have a schedule in order to follow through with things. So here are some examples of different ways you can use affirmations; take what works best for you, incorporate multiple techniques or just stick with one!

  • Repeat them out loud — This is a simple way to use affirmations and it’s easy to incorporate into your daily routine. If you do this right before falling asleep, your brain enters a relaxing phase with alpha waves. When you chant your affirmations then, your mind is the most susceptible to believing your affirmations.

  • Chant them in meditation — I find this works best when meditating for at least 5-10 minutes before you chanting affirmations. This ensures that your mind is already in a deeply relaxed state. You can pick a phrase that you want to concentrate on and repeat it to yourself over and over again. If you’re completely new to meditation I recommend guided meditation apps like Insight Timer or Headspace. You can also listen to soothing music to help. Check out this playlist I made specifically for meditation:

  • Write them down — EVERYWHERE. A fun way to do this is by writing on sticky notes and placing them all around your home. This is sweet, especially if you live with someone else, everyone can benefit from your positive affirmations! Make sure you stick them in places you see everyday. For example, your bathroom mirror, your fridge, on the dashboard in your car, etc. I also love writing different affirmations in my daily planner.

  • Have it on your iPhone wallpaper — I currently have an affirmation that says “I have the power to create change.” This is a phrase that I love re-reading, especially during moments of conflict or struggle because it reminds me of my capabilities and potential to turn any situation into a positive one. We all know that we pick up our phones too many times each day. So what does this mean? Every chance that you get to see your affirmation is a chance that your mind will start to believe it!

  • Use an app — There are plenty of apps that will give you reminders on your phone. I use one for iPhone called My Daily Affirmations. There’s also an app called Vision Board that allows you to upload and create images so that you can see all the things you desire to manifest in your life directly on your phone!

  • Use them in your yoga practice — Using affirmations during your yoga practice is a great way to encourage yourself to reach new levels, both physically and mentally. Pick one or two positive statements to use throughout your session, not just when a particular pose starts to feel difficult. Constant encouragement will keep your mind focused and help to prevent feelings of negativity — making it much more likely that you’ll enjoy and benefit from your session! Check out this Yin Yoga Class with Affirmations.

Helpful Tips

  • When coming up with your own affirmations, start with the words “I am.” (not always necessary, but definitely powerful)

  • Use the present tense.

  • Keep it brief and specific.

  • Include at least one dynamic emotion or feeling word.

  • VISUALIZE your affirmation.

It’s not enough to write your affirmation and read it. You must visualize it as well. From my personal experience, words, by themselves, do very little to bring about the desired result.

For example, if you use the affirmation, “I am deserving of having the most amazing clients and business that I can dream of”, start visualizing what that looks like for you.

  • What will you be wearing?

  • How will you feel?

  • What does a day in your life look like?

  • Who will you be spending your time with?

  • What would your office look like?

  • Where would you be working from?

Visualize it. Create a movie. Watch it happen. This is what brings amazing changes because you are aligning your frequency with a real tangible feeling of success on many different levels.

Oh and one last important tip: be patient when it comes to using your affirmations. This isn’t an overnight ordeal. It works but you need to be patient while the universe is working in your order. In the meantime you can take inspired action very day. Take small steps. You can’t expect to want an affirmation and not take aligned and inspired action very day to make it com true. There is some kind of physical work involved.

So, are you ready to try it?

Below is a list of some of my favorite affirmations:

Confidence

  • I am confident in my abilities.

  • I am capable of achieving anything.

  • I am the creator of my own reality.

  • I trust that my intuition will lead me to the right path.

Money

  • I am financially abundant.

  • Money flows freely to me and through me.

  • I am open and ready to receive money now.

  • I am in harmony with the energy of money.

Goals

  • I am able to achieve my goals.

  • I am open to receiving all the blessings of this abundant universe.

  • I will get to where I want to be and enjoy the journey.

  • I believe in myself and my ability to achieve my goals.

Happiness

  • I can choose to be happy in any given moment.

  • I have everything that I need to be happy.

  • I am appreciating the little things in life.

  • I am worthy of feeling happy.

Health

  • I am prioritizing my physical and mental health.

  • I am strong and healthy today.

  • I nourish my body with healthy choices.

  • I am grateful for my health, strength and vitality.

Love

  • I love myself and I allow myself to be fully loved.

  • I am grateful for the love that is around me.

  • I deserve abundant love.

  • I attract loving relationships into my life.

Peace

  • I am present within myself.

  • I can center myself with the ease of my breath.

  • I am grounded, worthy and whole.

  • I release what no longer serves me.

Self Worth

  • I am proud of myself and my achievements.

  • I am worthy of love and respect.

  • I am free of all limiting beliefs.

  • I am enough and who I am in this moment is enough.

As you start to create a new reality for your life based on the words you speak to yourself, and the actions you take, watch your life unfold in beautiful new ways. Remember the powerful impact that your words have on yourself and others. Be compassionate, speak kind words and give this world some much needed positive energy. You never know what kind of transformative effect or lasting impact you may have on others.

All my love,

Jessica

The Greatest Lesson I've Learned From Traveling

p-3 2.JPG

If this past month of adventuring into the unknown has taught me anything, it’s how to gracefully let things go and truly live in the present moment.

As much as I’d like to say I’m a “go-with-the-flow” kind of person, the truth is I’m the type who plans and usually overthinks everything. If there were guidelines and a how-to lesson for every single step in life, I would most likely use it.

Before embarking on my trip to Bali, I had carefully planned and studied everything well in advance. From booking flights and accommodations, to reading all the tips from travel blogs and articles I could find. On paper, my plan appeared flawless. We would arrive in Bali, Kuta to be exact, two weeks before the retreat in order to get familiar with the new area. Then, we would travel to Tejakula in Northern Bali for our retreat, where we would spend a week and an additional two days exploring the coast doing all the “touristy” things. After that, we would travel to Ubud, stay there for a week and eventually settle in Canggu for a month before having to do a visa run. I had the airbnbs and villas booked and the activities all mapped out. I thought that without copious planning I would be totally lost and I wanted to feel as “prepared” as possible.

Well, it turns out that I felt totally lost regardless… All of my planning and micromanagement didn’t matter once we got here. I quickly realized that navigating your travels in real life is completely different than what you imagine sitting in front of a computer screen.

During my time here I’ve ran into situations that hadn’t even crossed my mind when originally planning for this trip. For instance, when we went to get our visas extended at the immigration office in Denpasar, we ended up waiting for about 6 hours because the machines weren’t properly working. When the machines finally were up and running again, it took us about 3 minutes to get through the interview and fingerprints. To say that was a frustrating day would be a big understatement.

Another example, is when we finally arrived in Canggu, the area we planned on staying at for a month. It turned out that the airbnb host had given the room we booked to someone else! Luckily, we were able to get things sorted out and found a different villa in Ubud (an area we actually liked even better than Canggu). In the end, I felt grateful and relieved. But at the time, I remember feeling stressed and anxious about finding a new place in such short notice.

I could give you so many more examples of situations like this — situations that didn’t go nearly as smoothly or “perfect” as I had wanted them to. But the point is, no matter how hard you try to plan ahead, life is always going to throw surprises your way.

A certain bit of planning is usually necessary and good — prepare enough. But risk enough too. Risk will teach you far more than over-thinking anything ever will. Have a plan. A flexible plan. Yes, do the research on visas, health insurance, safety and what to pack. But you probably don’t need to spend hours each day researching like I did.

So here are my top 5 tips and reminders I’ve used throughout my trip to help deal with unpredictable situations. Maybe they will come in handy for you:

  1. Realize that you can’t control everything. No one can plan for every potential problem that might come up. The important thing is that you understand that you have the ability to problem solve in the moment. Part of this is accepting that problems will arise. Going with the flow is having the confidence that you will be able to handle the unexpected.

  2. Accept that you can’t control others. Going with the flow means sometimes giving up control, not only of the situation, but of other people. A situation might become more stressful because of the behavior of another person. For example, you might be hanging out and talking with a group of friends when suddenly someone says something that goes against your core beliefs and upsets you. Remember that in situations like this you can’t control someone else, but you can control your own actions, feelings and attitudes.

    • Try to empathize with the other person. Is what the other person said only hurtful to you or also to others around you? Why might they be acting the way they are acting?

    • Give them the benefit of the doubt. Most people are just trying to do their best and might not know that their behavior is being perceived as disruptive.
    • If these harmful actions continue to happen from the same person, it may be time to let that person go from your life.
    “Letting go doesn’t mean you have given up and it does not mean you no longer care. It just means that you are releasing the attachments of the past that keep getting in the way of your happiness and mental clarity. Letting go is the unbinding and disentangling of old behavior patterns that keep pulling you into unnecessary mental tension and worry.” — Yung Pueblo

  3. Live in the moment + honor how you feel. Dwelling on things you could have or should have done in the past will only make it more difficult for you to enjoy what is actually happening in your present. Accept that what is happening in this moment is your reality and that beating yourself up or spending your time searching for someone to blame is not going to change anything.

    • Sit with each emotion you feel and honor whatever is showing up. Give yourself some time (if possible) to process the situation and get down to the root cause of your feelings.

  4. Practice exposing yourself to the unknown. Get out of your comfort zone. It sounds cliché, but it works. Try doing a small unpredictable thing each day. Walk or drive a new way home from work without planning it. Go to a new place for lunch. Order something new you’re not sure you will like. Start a conversation with someone you don’t know very well. The more comfortable you get at putting yourself in situations that are unpredictable, the more easily you will be able to go with the flow no matter where you are.

  5. Let go of the idea that things need to be perfect. Practice Aparigraha, or non-attachment, which is one of the 5 Yamas from Patanjali’s 8 limbs of yoga. In this state of acceptance you learn to release expected outcomes. Sometimes it helps to remind yourself that things are never going to be perfect. You may set up an idea of how you want things to go, but rarely do they work out exactly that way. Striving for perfection is striving for something that ultimately does not exist. You don’t need to completely let go of your goals or ideas, just be sure to make room for the fact that things don’t always happen precisely the way you would like them to.

    • Focus more on the experience than the outcome. Whether you are cooking a new meal for the first time or trying a new workout routine, expecting that you’ll get it perfect the first time is only going to distract you from the joy of learning how to do something new. Instead, focus on the method and the joy of each moment, rather than obsessing about the outcome.

    • Avoid seeing yourself as a set of accomplishments. The things we achieve in life can give us confidence and make us feel good, but it becomes dangerous when we lean too much on them for all our happiness. Think about the other things that make you happy like a hobby you have, or a friendship/relationship you cherish.

I hope these tips help you to navigate through the next unpredictable situation that pops up in your life. And when all else fails, remember to take a deep breath and breathe. It can be difficult going with the flow if you are feeling overhwhelmed or anxious. Trust in the process and have faith that everything will work itself out in the end, because I can promise you, it truly will.

All my love,

Jess

CBD: everything you need to know

59797714-995B-4318-BBDB-2BCB984AE529 2.jpg

What is CBD?

CBD, short for Cannabidiol, is one of many natural components found in the cannabis plant. But no — it doesn’t get you high! CBD contains such a low dosage of THC (another compound in cannabis which is psychoactive) that it won’t produce the “stoned” or “high” effect that you get when you smoke marijuana. So essentially, you’re able to enjoy all of the natural benefits of the plant without the “side effects.” CBD offers many health benefits and it’s often isolated for medical use.

How does CBD work?

Alright, now let’s talk science! CBD is an integral part of the human body, since we also produce our own Cannabinoids (all animals do). In simple terms, the CBD compounds attach themselves to the Endocannabinoid System (ECS) which plays a key role in our homeostasis, meaning the balance and equilibrium between the different things that are constantly happening inside of us like appetite, pain sensation, mood, memory, regulation of body temperature, blood sugar level, pH levels, immune system, nervous system… in other words, we need Cannabinoids to stay alive and keep our bodies working at optimal level. When this system doesn’t function properly disease is created within our body. 

The CBD produced by cannabis (phytocannabinoids) mimics very well the CBD in human physiology, which is why it works so well as medicine for us.

In the past decade or more, there have been over 23,000 of studies published in peer reviewed medical journals detailing the effects of cannabis, cannabis oil, and cannabinoids on the body. Needless to say, there’s a lot of good information to be found about the positive effects of CBD for people.

A few books I recommend: Healing with CBD: How Cannabidiol Can Transform Your Health without the High & The CBD Oil Solution.

What are some of the health benefits of taking CBD?

CBD is a preventative source of plant medicine. Cannabinoids are neuroprotective, meaning they protect our brain cells from emotional trauma and inflammation. Here are some mental and physical benefits of using CBD:

  • Relaxation

  • Helps with social anxiety & stress

  • Reduces menstrual cramps + PMS symptoms

  • Treats Insomnia

  • Reduces symptoms of depression

  • Provides tension relief in the body

  • Improves memory

  • Aids in digestion

  • Strong evidence for treating epilepsy

  • Strengthens bones

  • Relieves migraines

  • Reduces symptoms related to cancer treatment

  • Reduces acne due to it’s ability to balance sebum production

  • Lowers blood pressure

  • Helps with addiction and substance abuse treatment

What should I look for when purchasing CBD?

Not all CBD companies are the same and their quality and processes vary greatly so it’s important to order from a reputable company. The only company I order from is Thoughtcloud. After doing a lot of research and even experimenting with other brands, I finally settled with Thoughtcloud because I found they have the purest source for CBD available. When purchasing CBD always check the ingredients. Make sure there are no other additives, preservatives or emulsifiers! Keep an eye out for the levels of CBD (mg) as well, because many CBD products don’t list the exact levels. You should also pay attention to where the CBD products are coming from. Was it sourced locally? How are the products packaged? Is this company giving back to the community in any way? It’s important to make sure you fully trust and believe in the company you’re buying from. Be sure to check out reviews from their customers as well.

** Thoughtcloud CBD has only organic, non GMO, vegan ingredients — plus, they’re Reiki infused, so you know its made with love! They’re sustainable and virtually waste-free in their manufacturing, packaging and farming practices. The CBD is lab-tested immediately after it is extracted and again by a third party laboratory in Colorado. Lab results can be emailed to you upon request by reaching out to admin@thoughtcloud.net! They also have multiple scholarship and assistant programs to help those in the community who may be struggling financially. They give back to cancer patients, veterans, children’s hospitals, animal shelters, etc. Hence, why I love this company so much. :)

Use code ‘CALM’ at checkout for 20% off every time you order!


Products

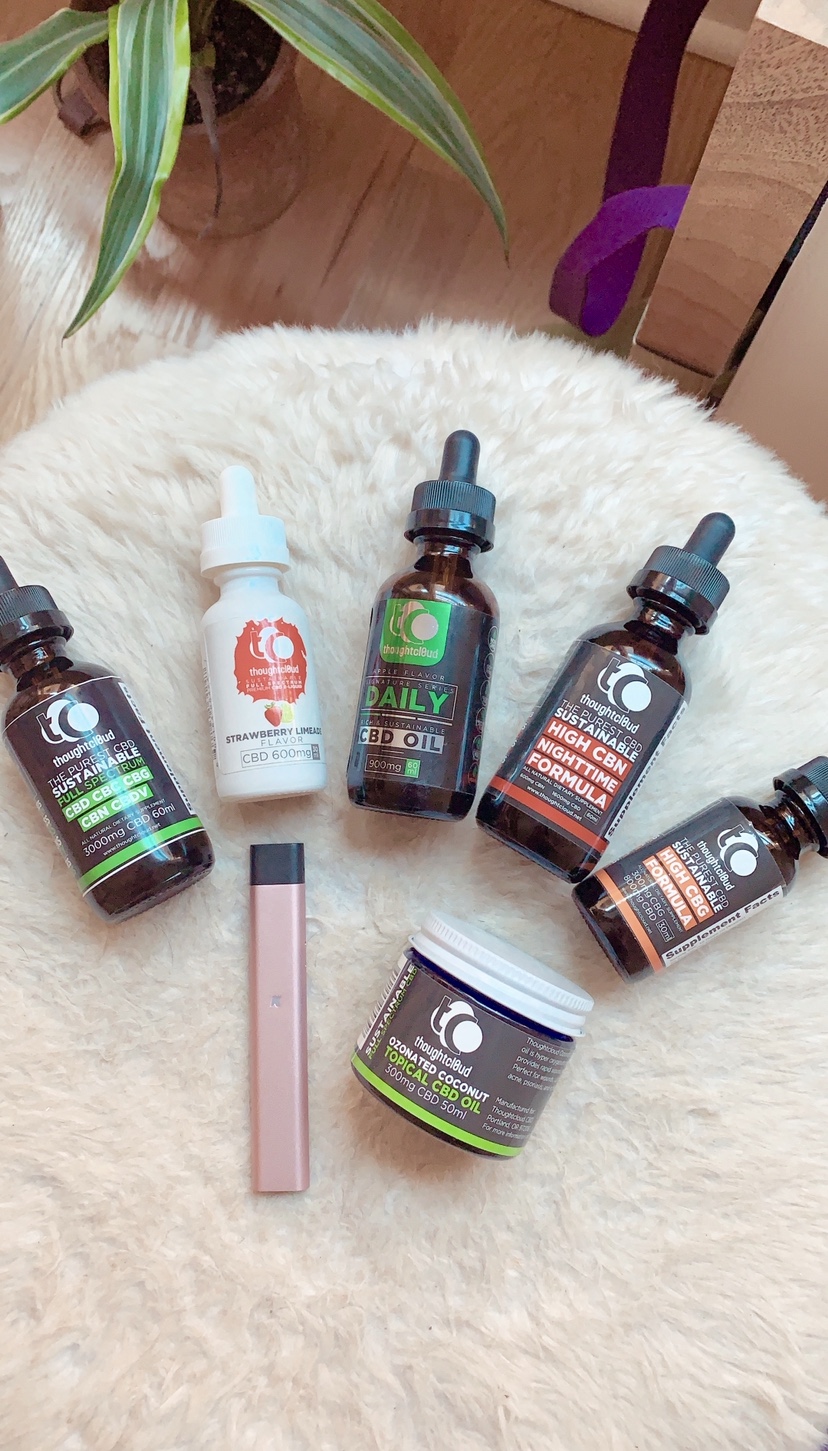
If you go to Thoughtcloud’s website you’ll see a ton of products. It’s awesome to have a variety of options to choose from, but I know this can also sometimes feel overwhelming, so I wanted to go through the site and highlight some of my favorites and explain some of the differences between them.

You’ll notice on the website there are a few different “types” of oil:

  • Full Spectrum

  • Sustainable Isolate

  • High CBG

  • High CBN

There are also different colored labels:

  • Green (coconut oil)

  • Blue (hemp oil)

  • Yellow (pets)

  • Purple (low-weight, i.e. kids)

  • Orange (high CBG)

  • Red (high CBN)

The only difference between the Coconut Full Spectrum and Hemp Full Spectrum is the carrier oils. Use the coconut for a milder flavor and switch to hemp if you’re allergic to coconut. There is no difference in potency. Only in taste.

And you’ll also notice different MG numbers:

  • 500mg

  • 750mg

  • 1500mg

  • 3000mg

The MG’s represent the amount of CBD per ML in the bottle. The amount of CBD remains the same in each bottle and is adjusted to keep the ratio depending on the size of the bottle. So no bottle is “stronger” than the other — the amount of CBD included in each bottle is in relation to how large the bottle is. (i.e. the 30ml will have double the mg of the 15ml and so on…)

*The only bottle that doesn’t follow this rule is the 500mg bottle which has less CBD than 750mg bottle with the same 15ml.

Now let’s look at the Full Spectrum, Isolate, High CBG and High CBN. Basically the formulas work to target different ailments. So depending on why you’re wanting to try CBD will depend on which formula you might choose. Let me list them out for you:

ISOLATE:
Anxiety, Lupus, ADD/ADHD, Stress, Bipolar, OCD, PTSD, Depression, Migraine/Headache, Hypertension, Cramps, Phantom Limb, Spinal Injury, Fibromyalgia, Anorexia, Cachexia, Gastrointestinal disorders, Nausea, Diabetes, Chron’s Disease

FULL SPECTRUM:
Chronic Pain, Asthma, Insomnia, Arthritis, Inflammation, Depression, Epilepsy, Multiple Sclerosis, Alzheimer’s, Parkinson’s, Spasticity, Osteoporosis, ALS, OCD

The difference between Isolate and Full Spectrum is that Isolate contains solely CBD whereas the Full Spectrum contains 5 variations of CBD. Those variations are CBD, CBC, CBG, CBN, and CBDV. 

HIGH CBG:
Allergies, Inflammation, Inflammatory bowel disease (IBS), inhibits abnormal cell growth, MS, Colon disorders, Huntington’s disease, Bladder dysfunctions

HIGH CBN:
Insomnia, Chronic Pain, Delays disease onset, CNS disorders, Alzheimer’s disease, MS Huntington’s disease, Amyotrophic lateral sclerosis (ALS), Parkinson’s disease, Neuroinflammatory disorders, Fibrosis


You’ll also see on the website there is a VAPE option and several different vape flavors as well as the Vape Bundle.

IMG_9522.JPG

Flavors:
Cheesecake, Birthday Cake, Horchata, Waffles, Mojito, Banana Split, Pina Colada, Strawberry Limeade, Orange Creamsicle, Cherry Cola, Bubblegum

Vaping is basically a way to '“smoke” the oil, but you can remove the negative smoking connotation that goes along with it because vaping CBD with Thoughtcloud’s CBD Pen is completely safe. There is absolutely zero damage done to your lungs from this specific vape. It’s made with fractionated coconut oil (MCT), that is the reactor, so you don’t have any harsh chemicals like Propylene Glycol that a lot of other companies are using as the heating reactor and preservative in their vape pens. One big factor to consider — and perk of vaping — is that you’ll feel the effects much more immediately than the oil. So if you’re dealing with anxiety or pain, you may want to try vaping over dropping the oil under your tongue to feel more immediate relief.

Here is an article you may find interesting if you are on the fence about trying to vape: https://www.leafly.com/news/health/vaping-cbd-oil-vs-ingesting.


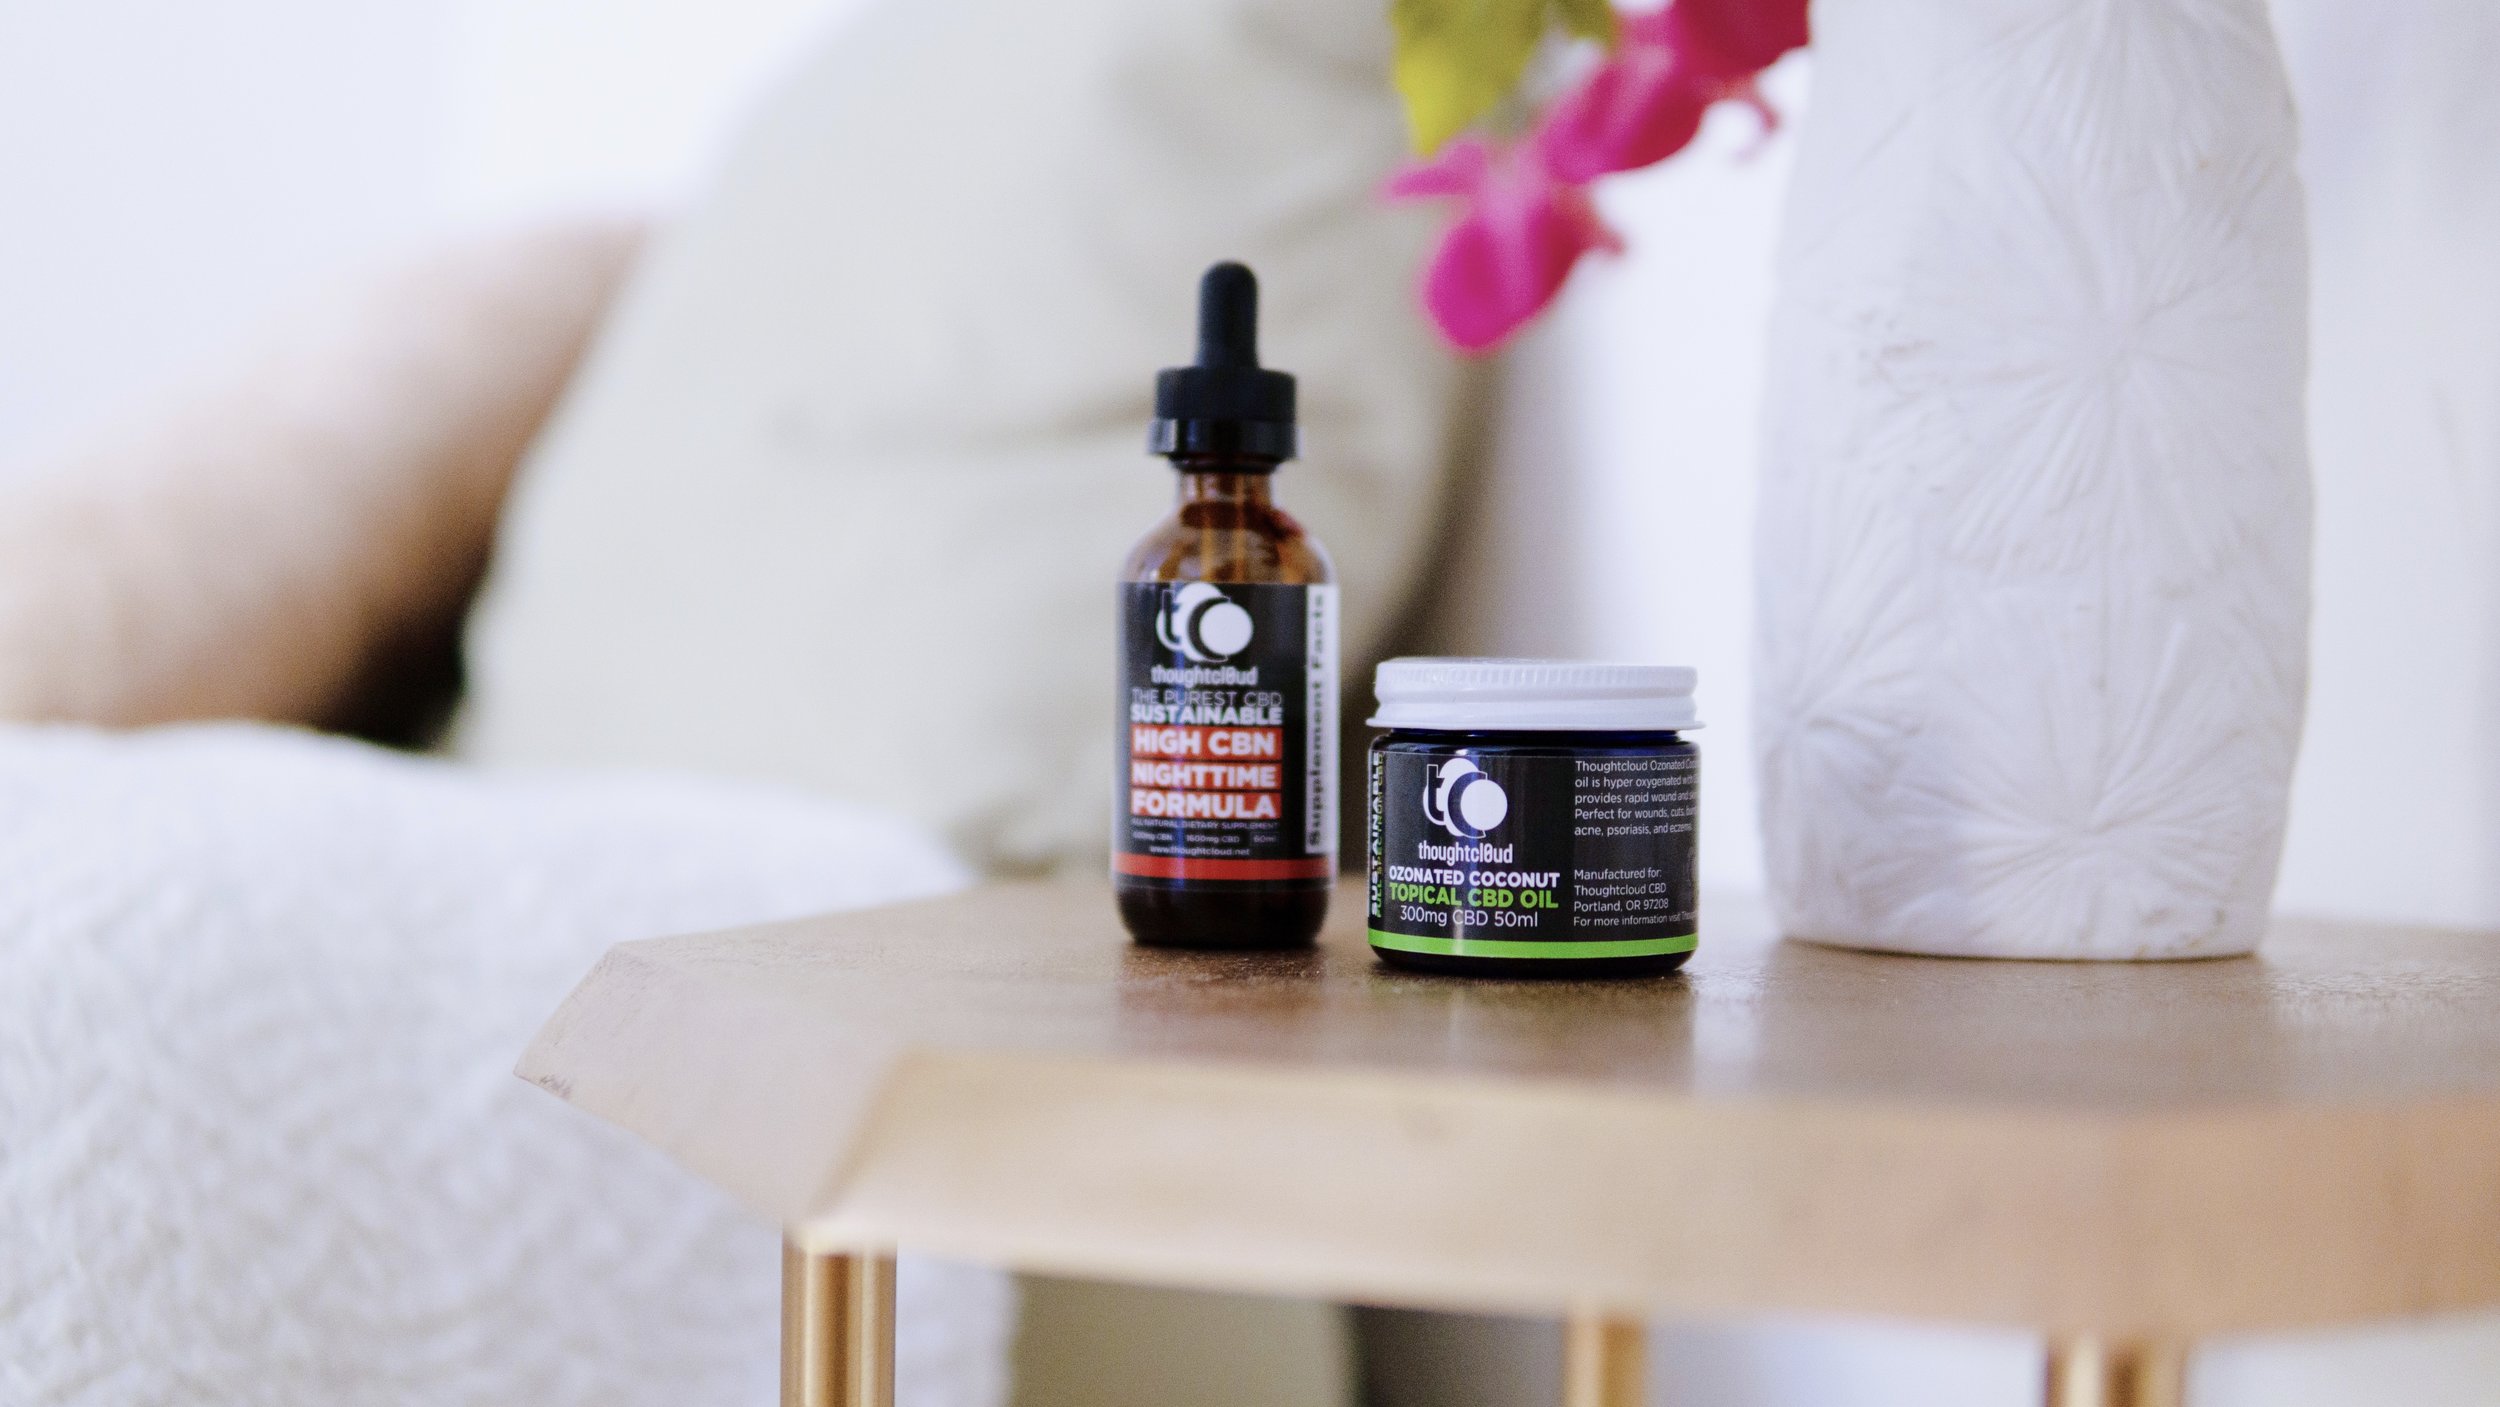
Thoughtcloud’s most recent addition is their topical + skincare line!

IMG_9523 2.JPG

For this line there are a variety of products as well. A couple of these products are currently out of stock so if they are at the time you read this post keep checking back because it’s worth it! 

If you’re wanting to use all-natural, vegan products, these are the way to go!


MY EXPERIENCE

I’ve been using CBD for the past 18 months and it’s been a huge part of my healing journey. From helping me manage anxiety and stress, to diminishing inflammation, reducing painful menstrual cramps and bloating to migraine relief and even helping me sleep better, I can‘t tell you enough how much I love and support the use of CBD. I’ve recommended it all to my family and friends and nothing makes me happier than to hear other‘s positive experiences from using this natural plant as well. I incorporate it into my daily routine just like any other supplement or vitamin. I use a mix of almost all of the products, so if you have a question, please don’t hesitate to send me a message and I’d be happy to help!

Which products do I use?

I use the Signature Series oil tincture which is the full spectrum and is available in 3 flavors (apple, cherry or grape). I have the apple and this is my favorite product as far as flavor goes! Another product I use is the Full Spectrum CBD (3000mg) in coconut oil (more bang for your buck), this one helps me manage any inflammation in my body and also gives me a mood boost - promotes mental clarity and concentration. The High CBG Formula helps provide allergy relief and the High CBN Nighttime Formula allows me to get better sleep. I’ve also recently started using the Isolate oil tincture which has specifically helped reduce my stress and anxiety tremendously! When I’m traveling I use the Full Spectrum Vape Pen Bundle with the Strawberry Limeade because it’s easy to slip into my pocket or bag and it provides a quicker sense of anxiety relief for when I need it. My favorite product from the topical + skincare line is the Ozonated CBD Topical Skin Issue Resolver (300mg), this helps my skin stay soft and moisturized and also keeps my cystic hormonal acne away!

How much do I use?

3-5 drops up to 3x daily of the oil tincture which is considered the “serving size”. I will sometimes incorporate the vape as well and take about 10-20 puffs.

THE DISCOUNT

I’m so stoked to be able to provide a discount code for to use anytime you order! It takes off a % depending on what your order is so the bigger the order, the more you save. AND you can use my discount code on all of their big sales promotions as well to save even more!

Discount Code: CALM


MORE FAQS

  1. Is CBD legal?

    Yes! According to The United States Agricultural Act of 2014 (the “Farm Bill”) listed products derived from industrial hemp with a tetrahydrocannabinol (THC) concentration of not more than 0.3% on a dry weight basis as legal in all 50 states. Thoughtcloud products contain between 0.00% and 0.3% THC — making it completely legal for them to ship CBD products straight to your doorstep via USPS!

  2. Will CBD make you high?

    No! CBD contains such a low dosage of THC (another compound in cannabis which is “psychoactive”)  that it won’t produce the “stoned” or “high” effect that you get when you smoke marijuana. So essentially, you’re able to enjoy all of the natural benefits of the cannabis plant without the “side effects.”

  3. Will CBD show up on a drug test?

    There is a 0.1% chance with Full Spectrum products when taking the recommended serving, as it contains up to 0.3% THC. (I’ve been tested in the past while taking this CBD and have not had any issues.) With the Isolate products there is a 0.00% chance, as the CBD is isolated and contains no THC whatsoever. Both formulas are completely non psychoactive when taking the recommended serving.

  4. What form does CBD come in?

    Oils, lotions, vapes, pills and more!

  5. Can I give CBD to my pets?

    Yes! All animals have an endocannabinoid system and can benefit from added levels of CBD. Click here to purchase CBD for your pet.

  6. How do I use CBD?

    CBD can be taken orally, topically or vaped.

    I place drops beneath my tongue and hold it inside my mouth for a minute or so, to maximize absorption. Most vials have the recommended servings on them, but start low and work your way up until you find the best results. Less is more with CBD.

    You can also rub the oil directly onto your skin for moisture and muscle relief, stir into your morning smoothie (my favorite way recently) or tea for an added boost of calm.

  7. Is the Isolate or Full Spectrum formula more effective?

    “A study done by the Haddasah Medical School at the Hebrew University of Jerusalem compared the effectiveness of a completely purified CBD versus a full spectrum extract of cannabis flowers containing large quantities of CBD. This study found that more anti-inflammatory material was bio-available in the full spectrum extract than in the isolated CBD alone.” (via thoughtcloud.net)

    https://providahealth.com/2018/03/23/cannabis-study-full-spectrum-cannabis-extracts-medically-effective-cbd-alone/

  8. Why is CBD so expensive?

    There is a long, detailed process that goes behind creating high quality CBD — from before the hemp seed is even planted to the harvesting, extraction, packaging and finally to the third-party lab testing (which is vital). If you think about it, this medicine has the power to replace your current medications, which will save you both money and health in the long run. It may cost more at the moment, but physical well being is ultimately priceless. Your body is your home and what you consume you become. Click here to read more about CBD and its costs.

    Thoughtcloud currently offer’s scholarships to veterans and those with low income. Click here to learn more.


If you have any questions that weren’t answered here, or would like to share your own experience with CBD please say hello! I will keep updating this blog as time goes on.

Kapha Season: 7 Tips To Stay Balanced

IMG_9452.jpeg

What is the Kapha season?

Spring is a season of change, growth and transition. According to Ayurveda, late winter and spring are known as Kapha season. Kapha is one of the three Doshas, or biological energies in Ayurveda, and it’s made up of water and earth. When balanced, Kapha gives strength, structure, stamina, beauty and immunity to the body.

Kapha season qualities include:

  • Dampness and moisture from melting ice, snow or rain

  • Heaviness and stagnancy in the air

  • Cold and cool temperatures

  • Dullness

In Ayurveda, it’s important to be mindful of what’s happening in the weather and environment because it can have an impact on what you’re experiencing internally. Even though your original “yogic DNA” called Prakit will never change, the changes you notice from external circumstances can make you feel like a different person, for better or worse. In excess Kapha, the damp, cold and heavy qualities can manifest as accumulated toxins, clogging the energetic channels and lowering your immunity. This is why the beginning of spring can trigger many seasonal imbalances, such as allergies, colds, fatigue and digestive sensitivities. 

Read more: Introduction to Ayurveda

How to avoid Kapha imbalances

To stay balanced, it’s helpful to adjust your diet, lifestyle and daily activities to suit each season. As mentioned before, Kapha is one of the three doshas in Ayurveda (the other two being Vata and Pitta.) When there is too much of one dosha, it needs to be reduced, and the other two can be introduced in greater quantities to help balance it out. So, to avoid Kapha imbalances, you simply need to reduce Kapha and counteract its qualities by adding more qualities of Vata and Pitta into your daily regimen.

Kapha balancing qualities are:

  • Dryness

  • Lightness, clarity

  • Warmth

  • Invigoration

By following the qualities above, you can help bring more balance into your daily routines, food, exercise and other self-care practices.

Below are some simple ways you can ensure to stay (or return) to a state of harmony:

  1. Embrace the season. Know that Kapha qualities are not bad. But in excess they can cause imbalances. So, embrace Kapha season! Appreciate this chance to absorb the energy from the earth and make the most of this slower, sometimes darker season; it’s okay to slow down and be a little more introspective than normal to restore balance in your busy day to day life. We don’t want to ‘give-in’ to the Kapha energy, but we also don’t want to ‘fight it’!

  2. Get moving! Since Kapha is heavy by nature it needs some extra movement to create stimulation and spring is the perfect time to move out some of that lethargic energy from winter. Keep it fun — move your body in new ways! Try power or hot yoga, pilates, dancing, playing a sport, going for walks, biking or joining a fitness class. If you’re inside, you can try a new home workout routine by finding free classes online!

  3. Wake up early. Just like Kapha has a season, it also has a time of day: usually around 6am - 10am in which your body is programmed to be slow. By rising before sunrise you can begin the day more energized. When you step into the Kapha time of morning, it makes getting up more difficult — hitting the snooze button might be tempting but by prioritizing waking up early you’ll be able to beat the sluggishness that comes from sleeping in too late. Adjust your bedtime around whatever wake time is right for you to ensure that you get enough (but not too much) sleep.

  4. Adjust your diet. Kapha dosha is slow, heavy and cold so your digestion can take on these qualities during this season. In the winter months we tend to eat heavier foods. In the spring choose foods that are lighter, drier, more pungent and warming. Spring favorites include sprouts, leafy greens, asparagus and berries. Include spices such as turmeric, cumin, coriander, fennel, cinnamon and ginger. Try eating less of or eliminating foods that increase Kapha — heavy, fried, cold, fat-rich foods such as meat, seafood, poultry, dairy products and foods cooked in oil — especially in the morning and at dinner. It’s suggested to wait at least three to four hours between meal to support a healthy digestion!

  5. Do a gentle spring cleanse. Drink warm water or tea with lemon and ginger, like this one. Both of these are heating by nature and help to release any “sticky” or “heavy” elements within your body that you may have accumulated over the winter! Sip before meals to improve digestion and remove toxins from your body. Reduce seasonal allergies and excess mucus by using a nasal “netti” pot with warm water and sea salt when you wake up.

  6. Change it up! If you feel like you’ve gotten complacent or “stuck” in any area of your life… try seeking some variety to create inspiration! Look up a new recipe, clean out your closet and try a different style, take on a new hobby and switch up your routine a little!

  7. Manifest your dreams. Spring is a time for regrowth, new intentions and new ideas, so use this time to envision the specific kinds of changes that would most deeply benefit you and set specific goals for achieving your dreams. Try journaling, meditating or creating gratitude lists to help.

How do you practice staying balanced during Kapha season? I’d love to hear your thoughts and additional tips!

All my love,

Jess


Disclaimer: This article was written for educational purposes only and is based on the tradition of Ayurveda. It is not intended to treat, diagnose, prescribe or heal any health condition or to replace standard medical treatment or advice.

12 Yoga Poses For Beginners

If you're brand new to yoga, it's important that you start off by learning the essential postures so that way you can feel comfortable in a class or practicing on your own at home.

I've put together 12 poses that are most commonly used and vital for beginners. I've even arranged them in order of a sequence/flow so you could use this as a practice on it's own! Hold each pose for 5-10 breaths. Repeat as often as needed. Have fun!


IMG_7860.jpg

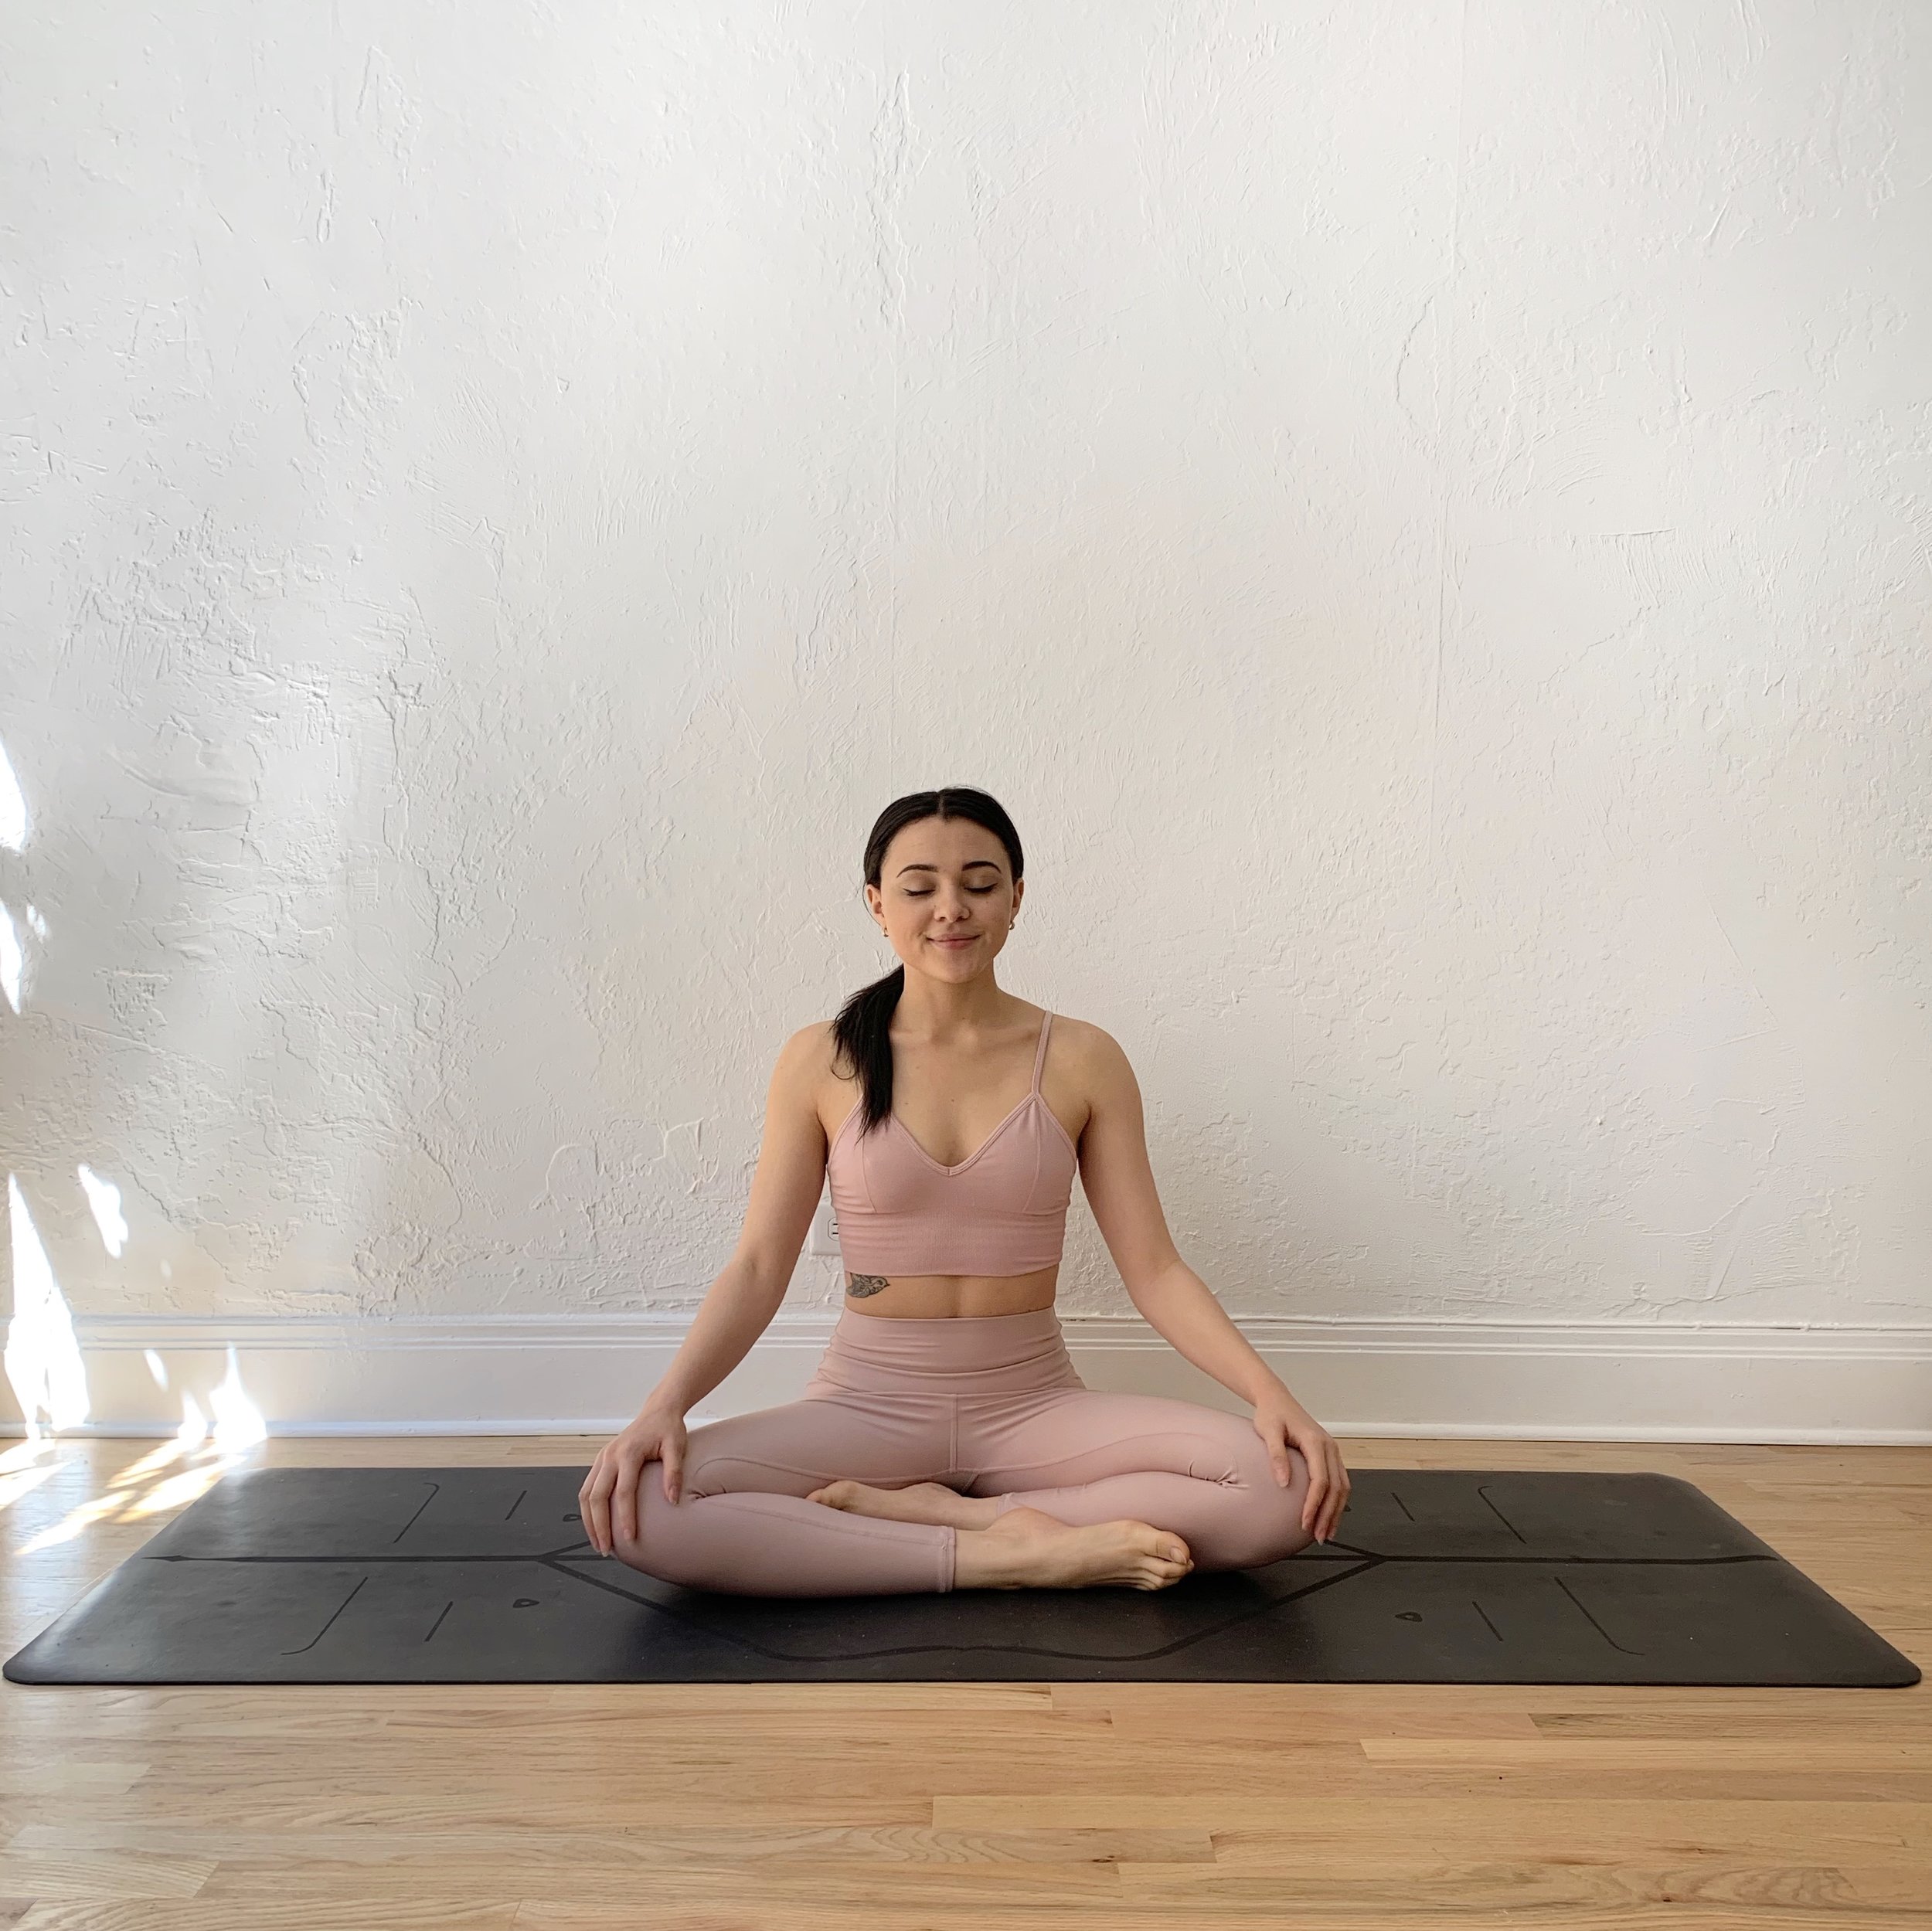
1.     Easy Pose (Sukhasana)

  • Begin sitting on the mat with your sit-bones on the front edge of a firm cushion or folded blanket.

  • Cross your shins parallel to the mat, bringing each foot beneath the opposite knee. Try to bring your feet in line with the knees.

  • Lengthen your spine keeping the natural arches in the spine, push your sit bones into the floor to root down and create length through the crown of your head. Firm your shoulder blades in.

  • Place your hands on your lap or knees with palms up (more open), or palms down (calming).

  • Try to switch the cross of your legs when you next come into the pose.

IMG_7870.jpg

2.     Cow Pose (Bitilasana)

  • Begin on all fours with your hands under your shoulders and your knees under your hips.

  • As you inhale, roll your shoulders away from your ears, look up and arch your spine.

  • Stay here for at least three deep breaths. Repeat 3-4 times.

IMG_7875.jpg

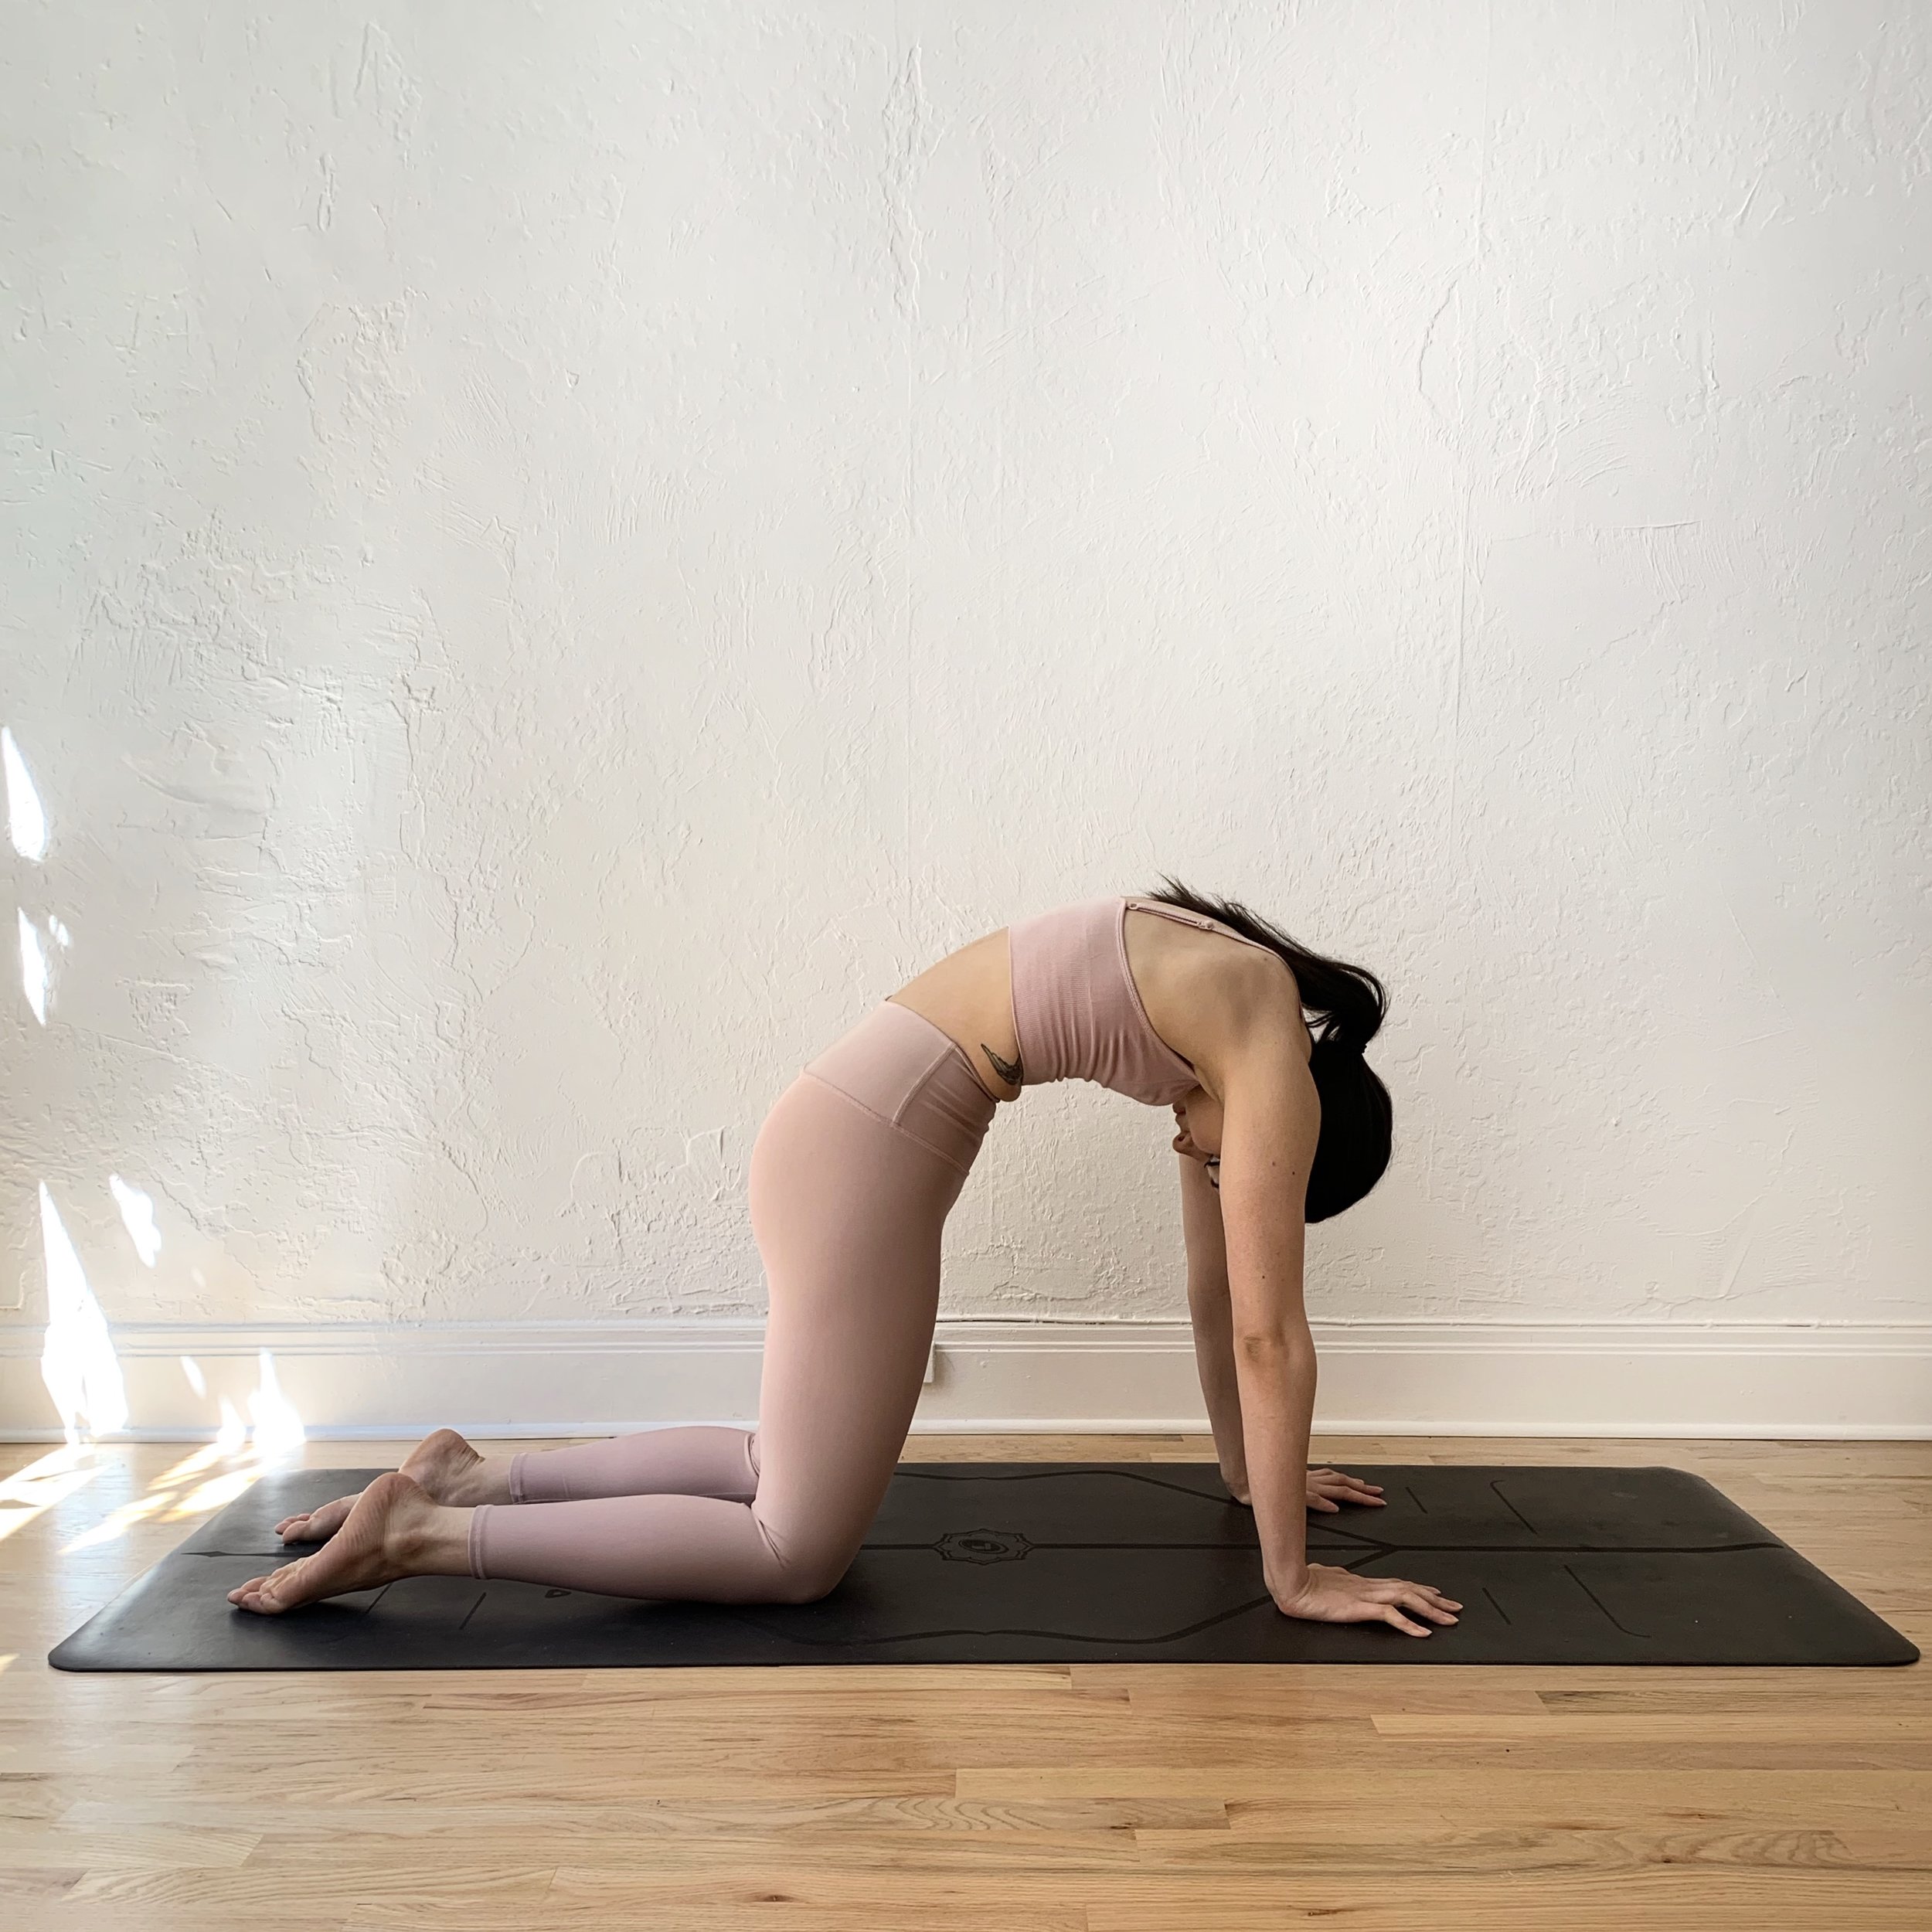
3.     Cat Pose (Marjaryasana)

  • Begin on all fours with your hands under your shoulders and knees under your hips.

  • Take a deep breath to inhale.

  • As you exhale, pull your belly button to your spine and press the floor away with your hands and knees, rounding your spine like a cat, stretching your lower back and spine.

  • Take at least three deep breaths. Repeat 3-4 times.

IMG_7882.jpg

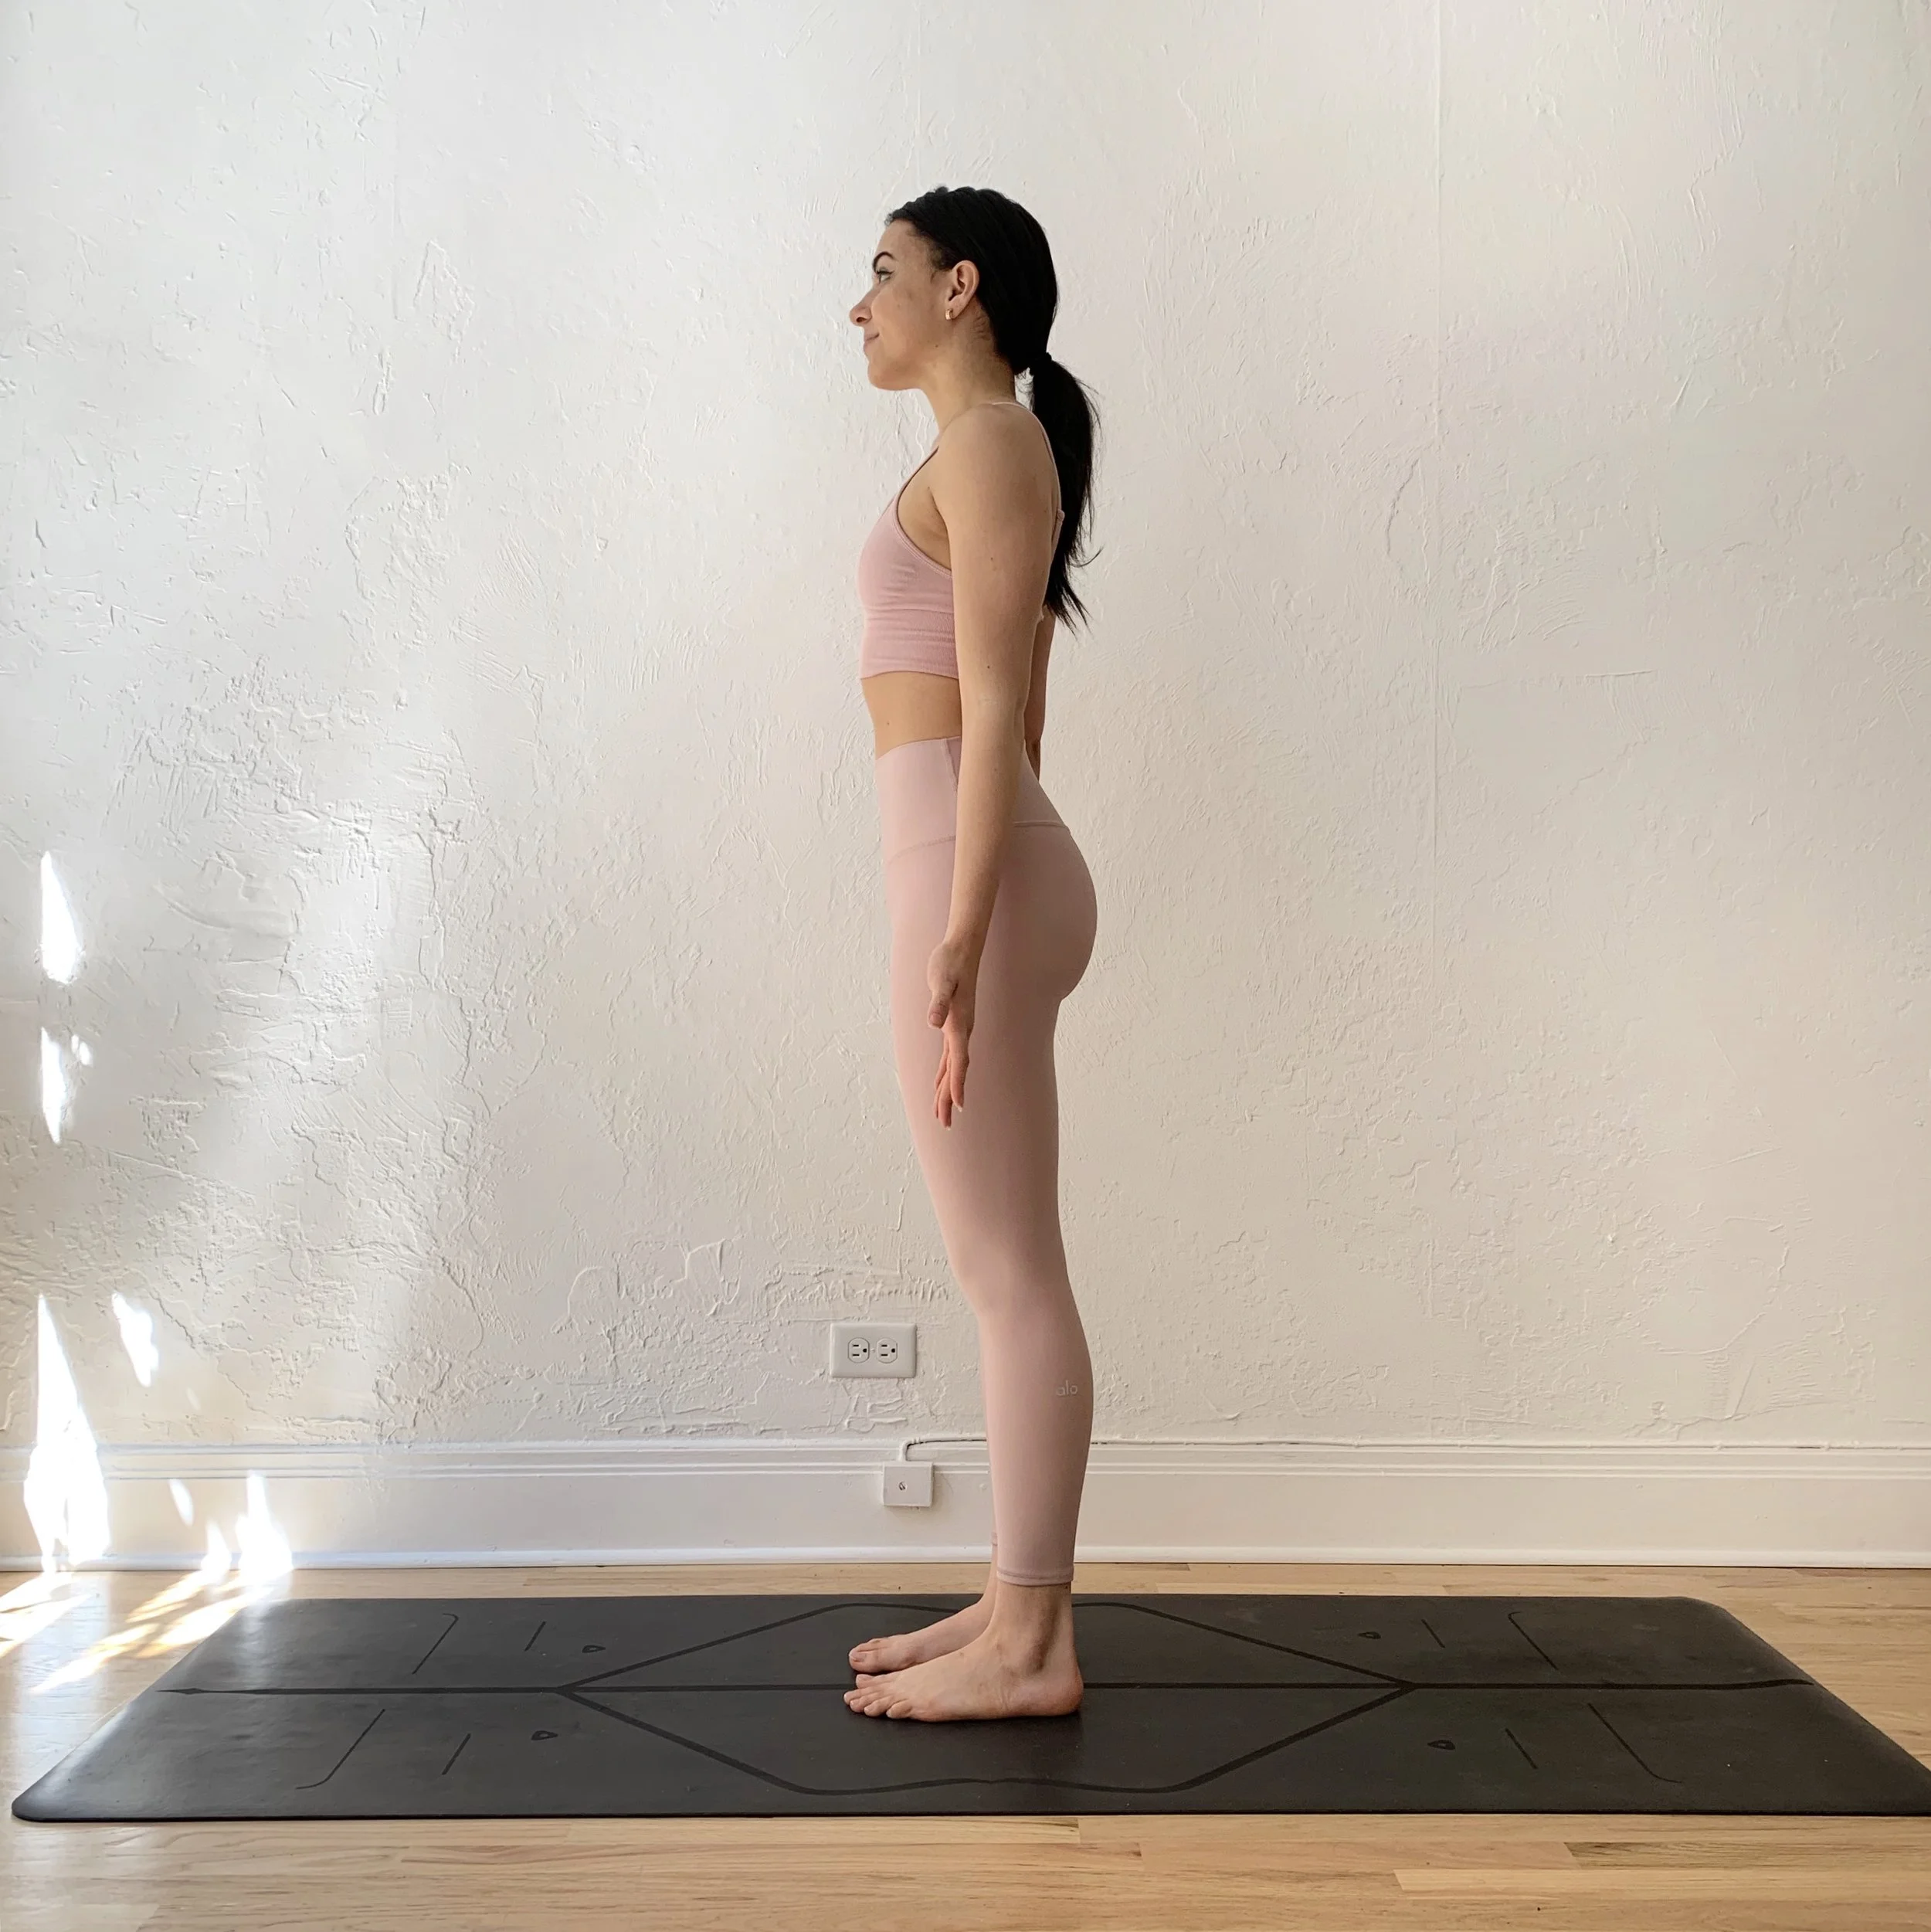
4.     Mountain Pose/Upward Salute (Tadasana/Urdhva Hastasana)

  • Start in Mountain Pose by standing with your feet together and arms by your side.

  • As you inhale, sweep the arms out to the sides and up toward the sky. You can finish with your arms parallel above your head (palms facing each other) or when your shoulders allow, your palms can be pressed together.

  • Fully extend your elbows and reach up through your fingertips.

  • With your neck still being an extension of your spine, bring your upper chest towards the sky and bend your back slightly (the bend comes from your middle/upper back, not your neck). Be careful not to over-arch your lower back or compress your neck!

IMG_7886.jpg

5.     Chair Pose (Utkatasana)

  • Begin standing in Mountain Pose.

  • Bend your knees, sink your hips back like you are sitting down in a chair and reach your arms high, framing your face.

  • Look in front of your knees and make sure you can see your toes. If you can’t, sit your hips back until you can, placing your body weight evenly into the heels.

  • Drop your shoulders down away from your ears and look up slightly. Stay here for at least 3-5 deep breaths.

IMG_7883.jpg

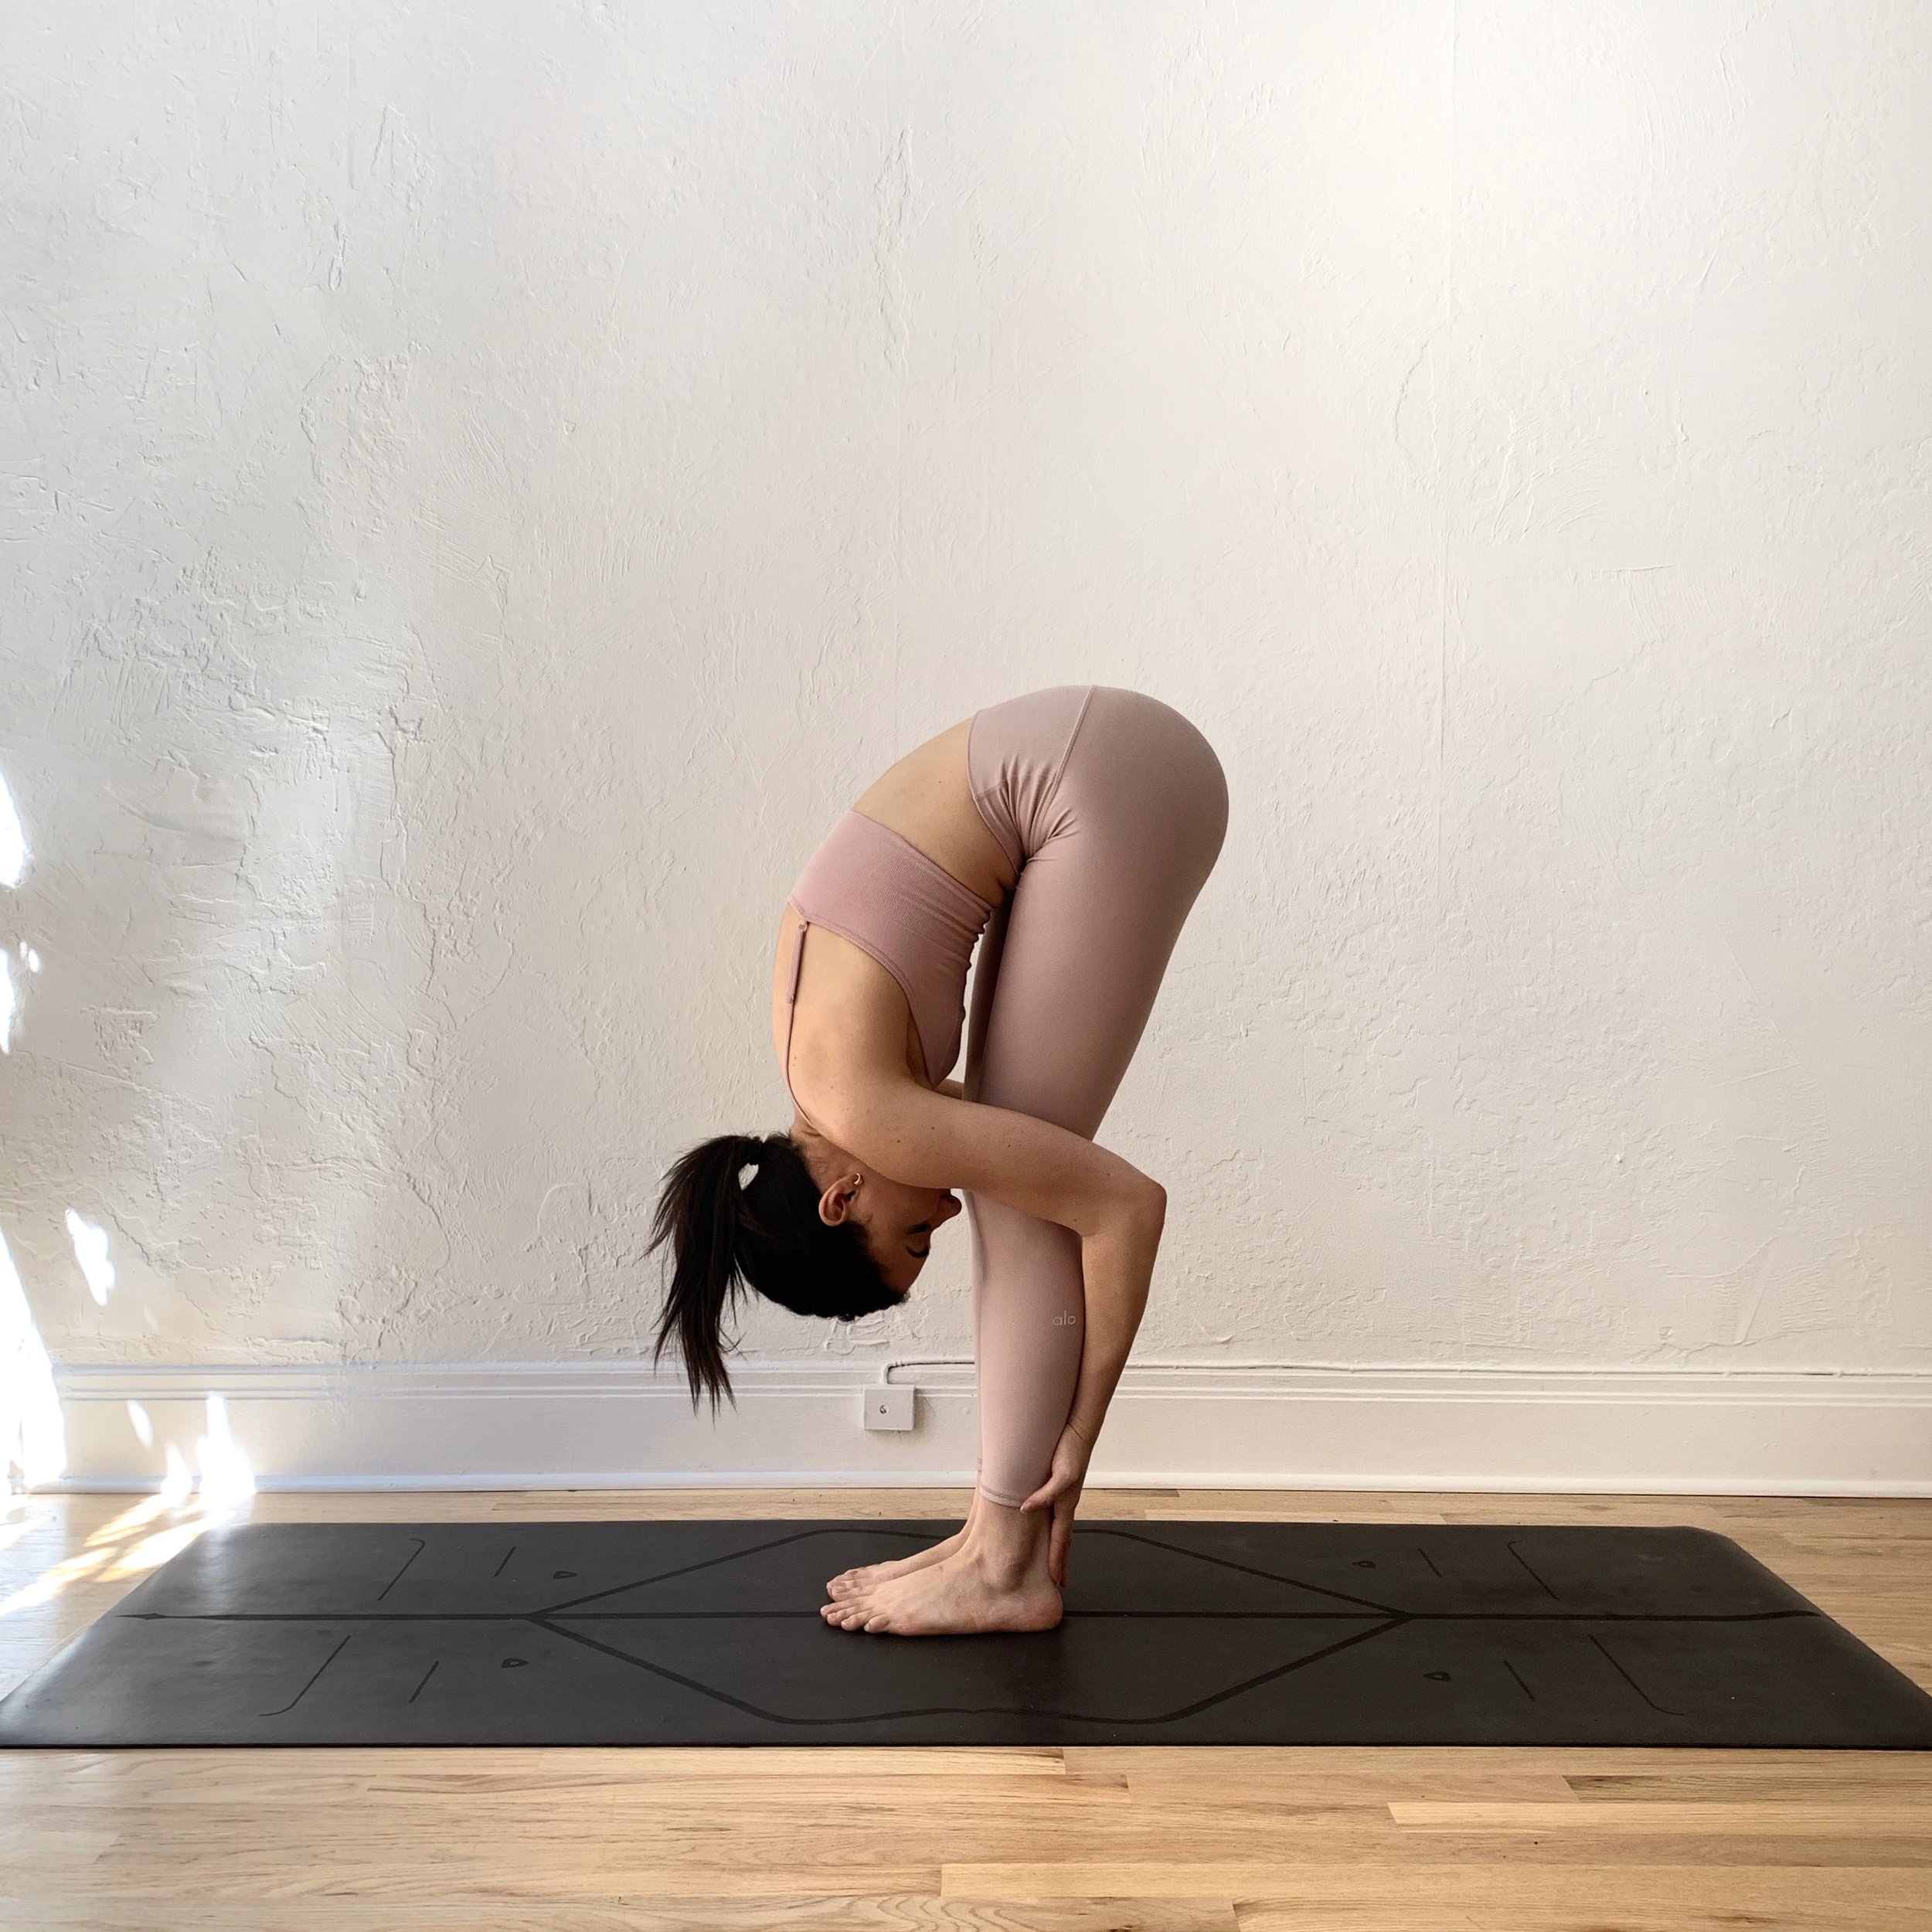
6.     Standing Forward Bend (Uttanasana)

  • Begin standing in Mountain pose.

  • As you take a deep inhale, reach your arms up over your head, framing your face.

  • As you exhale, engage your core by bringing your navel to your spine and swan dive over your legs with a flat back.

  • Place your hands on the floor slightly in front of or behind your feet. Press all four corners of both feet into the ground and lift your hips up and back toward the ceiling. Relax your head and neck. Breathe here for at least 2-3 deep breaths.

IMG_7918.jpg

7.     Four Limbed Staff Pose (Chaturanga Dandasana)

  • Begin by laying facedown on your yoga mat with your arms alongside your body.

  • Bend your elbows and slide your hands up to your chest level with your palms flat, facing down.

  • Tuck your toes under and on an exhale, lift your torso in and up and press your palms and toes down, as you lift your whole body a few inches above the mat.

  • Forming a straight long line from your head to heels and continue to lift your knee high, engaging the front of your thighs.

  • Try to hold this position for 20-30 seconds and then relax back down onto the mat and repeat for several times.

IMG_7925.jpg

8.     Cobra Pose (Bhujangasana)

  • Lie face down on your stomach with your legs straight back, spread at hip-width apart and tops of your feet facing the mat.

  • Resting your forehead on the mat, relax your neck and shoulders, bend your elbows and place your forearms on the yoga mat with your palms facedown and positioned near our head.

  • Breathing diaphragmatically, as you inhale, pull down your shoulders and engage your back muscles, press your forearms against the mat and raise your upper-body off the mat. Looking straight ahead, keep your forearms and the front of your body pelvis on the floor, try to relax your shoulders and keep them down away from the ears.

  • Exhale and slowly lower your head and upper-body and torso back down to the yoga mat. Repeat this pose 3-4 times. Each time stay in the last raised position for 5-6 breaths.

IMG_7892.jpg

9.     Downward Facing Dog (Adho Mukha Shvanasana)

  • Start on your hands and knees. Straighten your arms but do not lock your elbows. Align your wrists directly under your shoulders and your knees directly under your hips. Your middle fingers should be pointing directly to the top edge of the mat.

  • As you exhale, lift and straighten (but don’t lock) your knees. Stretch your elbows and relax your upper back.

  • Spread your fingers wide and press them firmly through your palms and knuckles to distribute your weight evenly across your hands.

  • Press your heels toward the floor to feel a deep stretch in your hamstrings and your head toward your feet. Your body should form the shape of an “A”.

  • Repeat steps 1-4 three times and then stay here for 5-6 breaths.

IMG_7895.jpg

10.  Warrior I (Virabhadrasana I)

  • Begin in Mountain Pose by standing with both feet together, shoulders down and spine straight.

  • Step the left foot toward the back of your mat to come into Warrior 1.

  • Bring the left heel to the floor and turn the left toes out to about a 45-degree angle.

  • Begin to bend the right knee over the right ankle. You may need to adjust the length of your stance (front to back). You can also widen your stance (side to side) for greater stability.

  • As you inhale, bring your arms up over your head. The classic position is with the palms touching overhead, but you may choose to keep the palms separated at shoulder’s distance apart or even bend at the elbows.

IMG_7898.jpg

11.  Warrior II (Virabhadrasana II)

  • Begin in Mountain Pose, step your left foot back so that it’s parallel to the back of the mat.

  • Feel the inside of your thighs open towards the outside edge of your feet. Extend your arms out through the fingertips as you draw the shoulder blades together. Let the top of the hsoulders drop away from the ears. Gaze over your right middle finger.

  • Ground down the outside edge of the back foot and draw up through the inside of the arch.

  • Shoulders over hips, elbows roughly over knees. Head above tailbone. Smile, above all.

IMG_7906.jpg

12.  Final Resting Pose (Savasana)

  • Lie down flat on your back face up, separating legs and letting the fleet splay apart. Place arms along the sides, palms facing up.

  • Place a small pillow or folded blanket under your head, if you need one, and another one under your knees for added comfort to relax.

  • Close your eyes and relax. Release any tension from the body.

  • Take a couple of big deep breaths, lengthening your spine as you exhale.


What Is Cupping Therapy?

F181494F-002F-4290-9402-EFE623654E5E.jpg
B754D907-00ED-416D-8406-44D207ED3319.jpg
FullSizeRender.jpg

Recently, I had my first cupping experience at Wild Earth Acupuncture- and it was amazing. I’ve always been curious about trying cupping as I love learning about different healing modalities and ways to keep the body healthy. I tend to hold a lot of stress and tension in my upper body, specifically my shoulders and upper back. Right after the treatment, I felt an immediate release in my muscles (and the results lasted for weeks!) I was truly amazed. Afterwards I sat down with Lenore, owner of Wild Earth Acupuncture and a licensed acupuncturist and herbalist, and she gave me all the details on cupping.

Lenore was kind enough to write and share her expertise on the topic! Hear from her below as she explains cupping therapy, it’s benefits and other important things to know about it.


Cupping therapy is an amazing modality that is often associated with Chinese medicine and acupuncture, but this ancient healing craft has roots in many cultures around the world. This modality consists of special cups being placed onto the skin and held there with suction. The suction can be created by fire, or air. It is often used to help people heal from injuries, reduce inflammation and pain, and increase blood flow.

 
IMG_4997.jpg
 

Various types of cups can be used such as bamboo, horn, clay, or bone, but the most common ones used are glass and silicon. There are also various techniques that can be utilized depending upon your chief complaint. One of the most common techniques of cupping is called fire cupping, in which the therapist or Acupuncturist will light an alcohol swab or soaked cotton ball, place the flame quickly into the cup to create a suction and place the cup upon the skin. The heat nor flame never come into contact with the body. The cups can be left stationary, to focus upon a specific acupuncture point, muscle or meridian, or they can glide across the skin for more myofascial release and circulatory effect.  The silicon cups are similar yet they do not use flame but are used with small trigger that removes air from inside the cups when placed onto the skin.

These cups leave distinct marks on the body, that often fade within a few days to a week. These cupping marks are different than bruises, as the cupping does not injure cells but helps express and release old injuries and un-metabolized blood beneath the surface, which causes things such as pain or restricted range of motion. The marks vary from person to person, and are not always a clear depiction of how “well” the cups worked. The areas of the body that are being cupped are experiencing increase blood flow which can lead to decreased muscle tension, reduction of inflammation and increased circulation.

This modality is not only super effective but it also feels amazing and people walk away after the first treatment feeling better, more relaxed and in less pain. Make sure to check in with your acupuncturist or massage therapist to see if cupping is right for you!

Benefits of cupping:

  • Increases healing times

  • Myofascial release

  • Improves circulation and range of motion

  • Increases blood, lymph and Qi flow

  • Improves respiratory health

  • Improves gastrointestinal health

  • Helpful in treating physical manifestation of stress

Caution and contraindications:

  • If you are taking blood thinners

  • Open wounds

  • If you have sensitive skin

This article was written by Lenore Cangeloso LAc. MSAOm., a Portland-based Acupuncturist and Herbalist. Check out her website www.wildearthacupuncture.com to learn more!


5 Steps To Creating A Home Yoga Space

untitled 2.jpg

Creating a home yoga space is a beautiful way to honor yourself. A space that is meant solely for movement and yoga reinforces the importance of your practice and can help you establish a more consistent practice routine. I can't imagine where I’d be at today if I hadn’t started (and stuck with) my own home yoga practice nearly five years ago. Having a safe and sacred place at home where I can retreat to at any time is so special.

The following are a few tips for setting yourself up for a successful and enjoyable home practice by creating an inviting home yoga space!

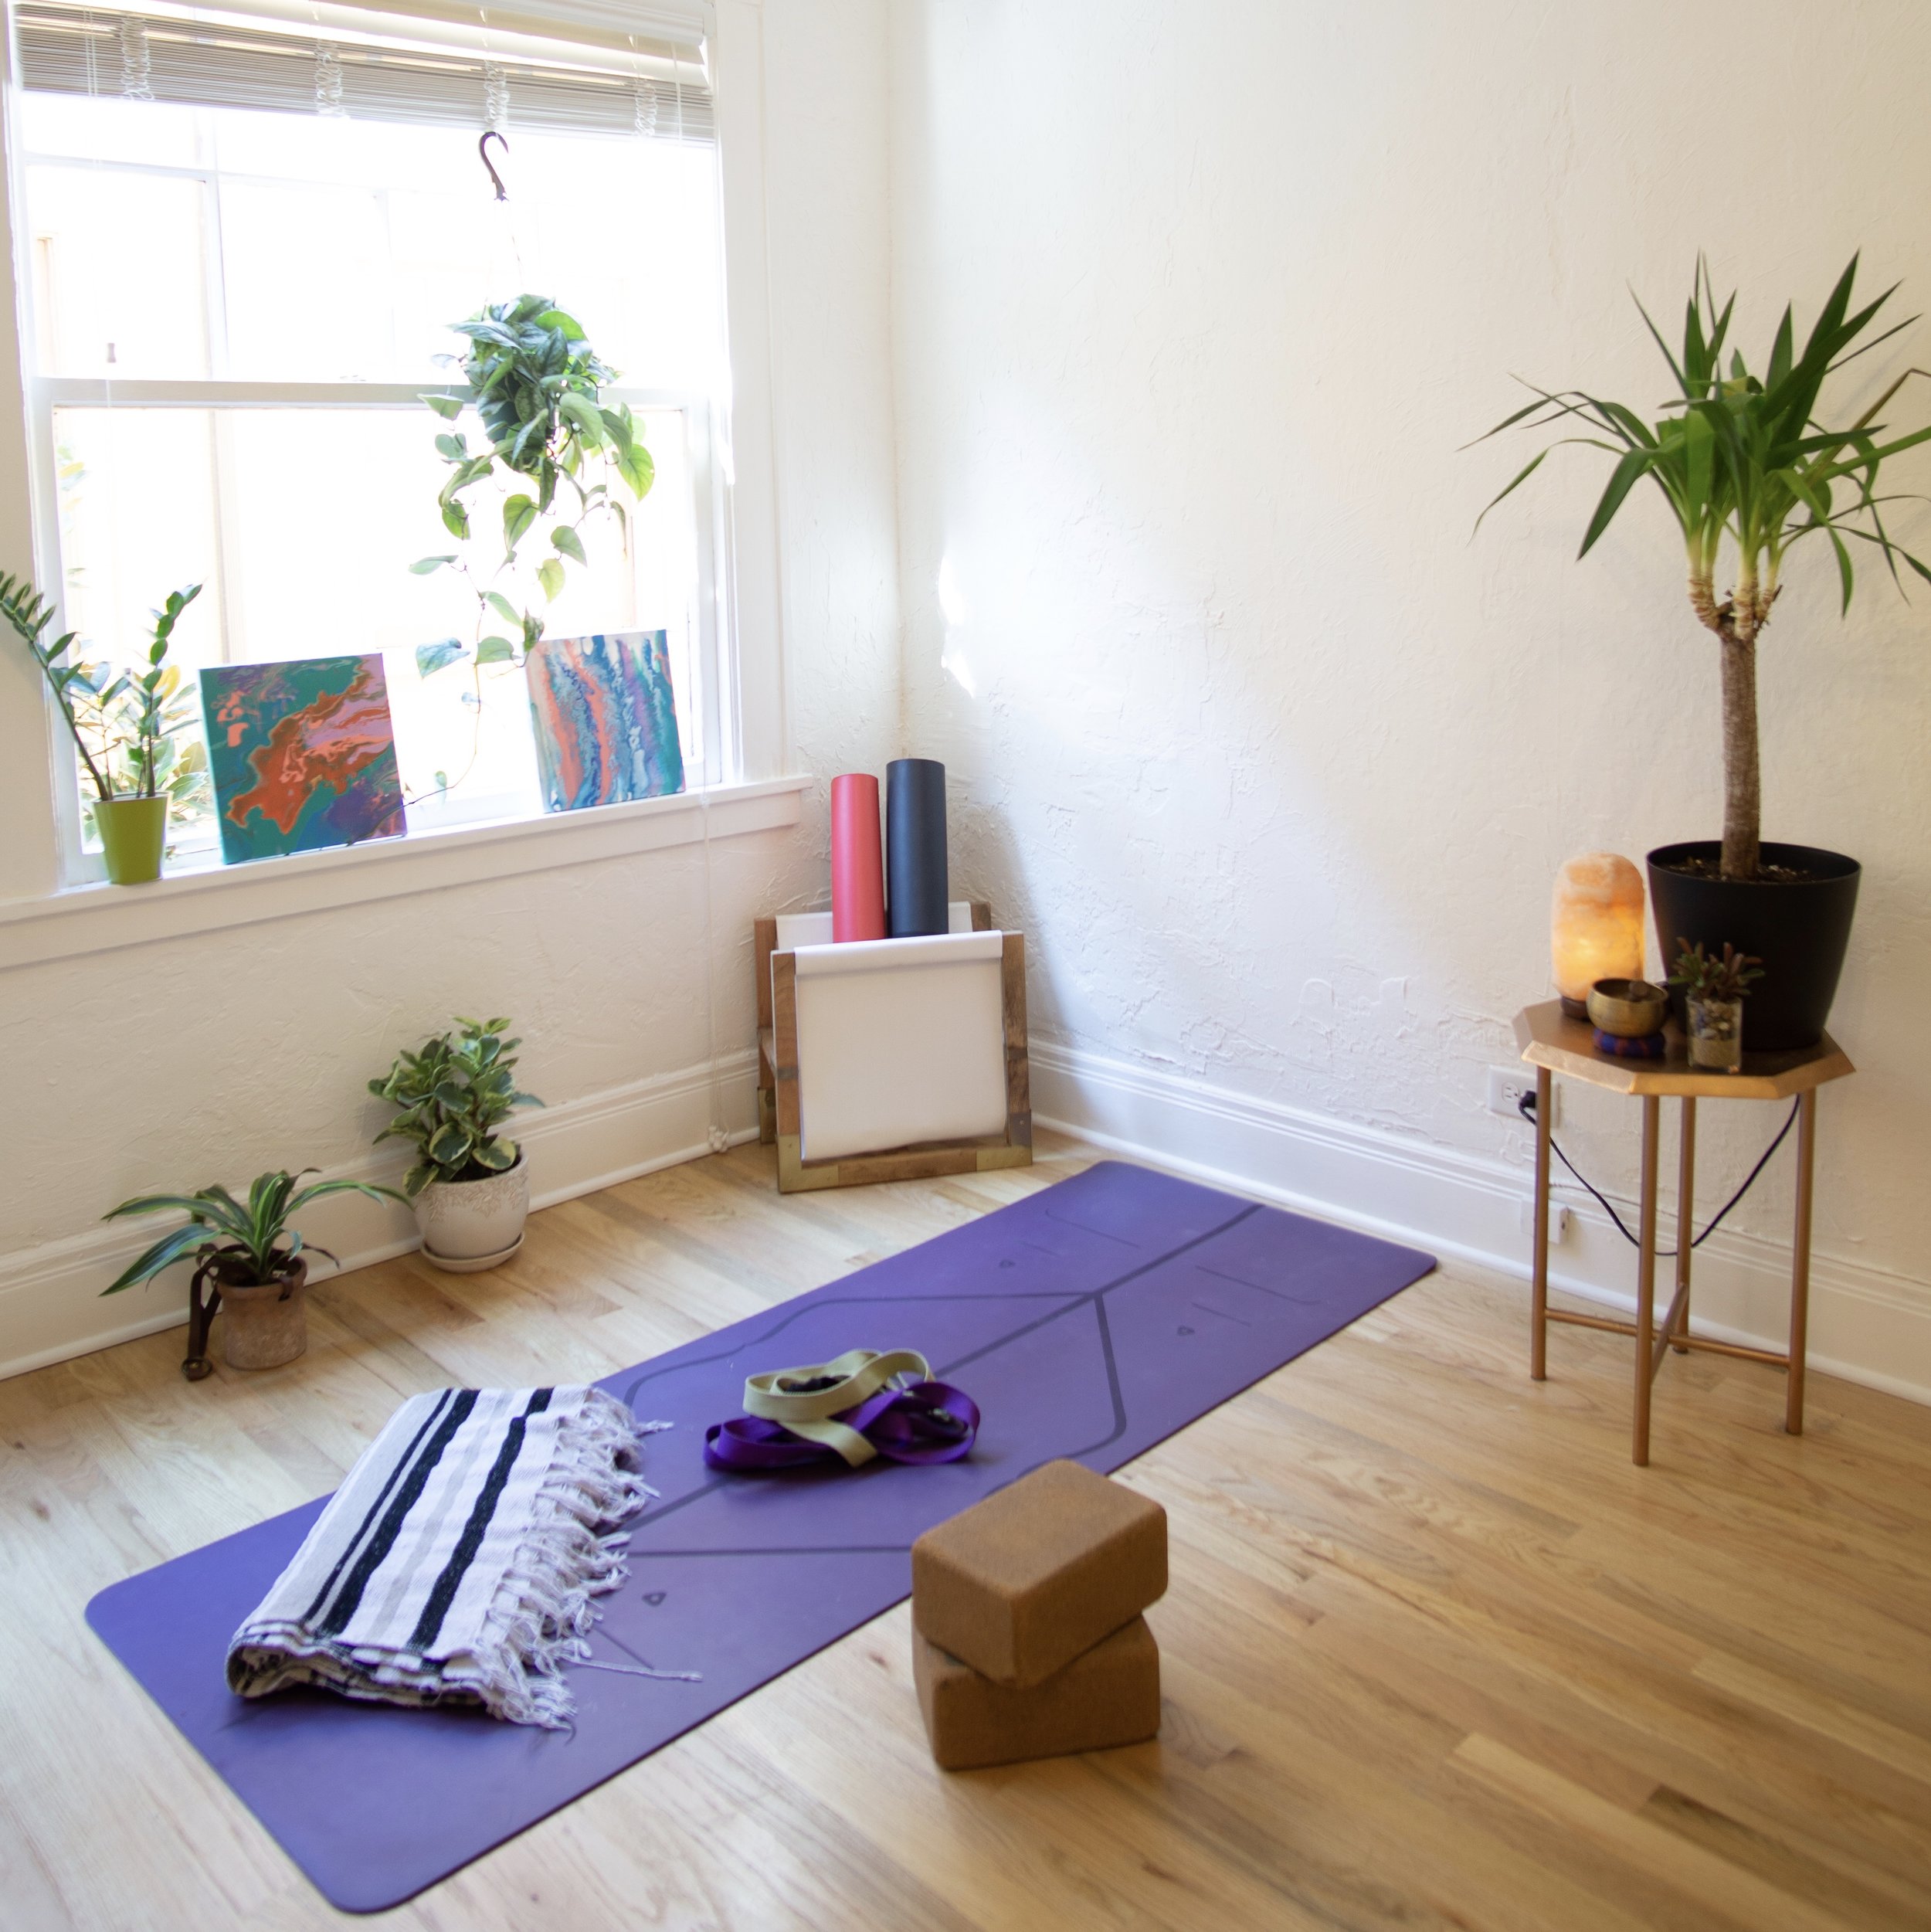
  • Step 1: Create space for a mat. This is really the only requirement for a home practice. Having a designated space to practice will help you stay consistent. If you don’t have to think about where to unroll your mat, you’re already one step closer to practicing. Many people believe they can’t practice yoga at home because there’s no room in their house. When in reality, you don’t need to have an entire extra room to devote to your practice. All you need is enough space for a mat. I live in a studio apartment and I usually move my kitchen table so that I can practice next to the windows. You don’t need a ton of space! And it’s perfectly okay if your home yoga ‘studio’ is a multipurpose space. You could use a small corner in the living room, or even the space next to your bed. There’s always room for yoga, even in the tiniest of spaces.

  • Step 2: Make sure your space is peaceful. I suggest choosing a space that’s near natural light and that’s free of noise and other distractions. Your yoga space should be a place where you can bend, stretch and practice in peace. If you live in a temperate climate, you could even take your practice outdoors. At my old home, I turned the garage into my own little yoga space. I loved it because there was always natural light and fresh air. A secluded balcony or patio would make an amazing zen area as well.

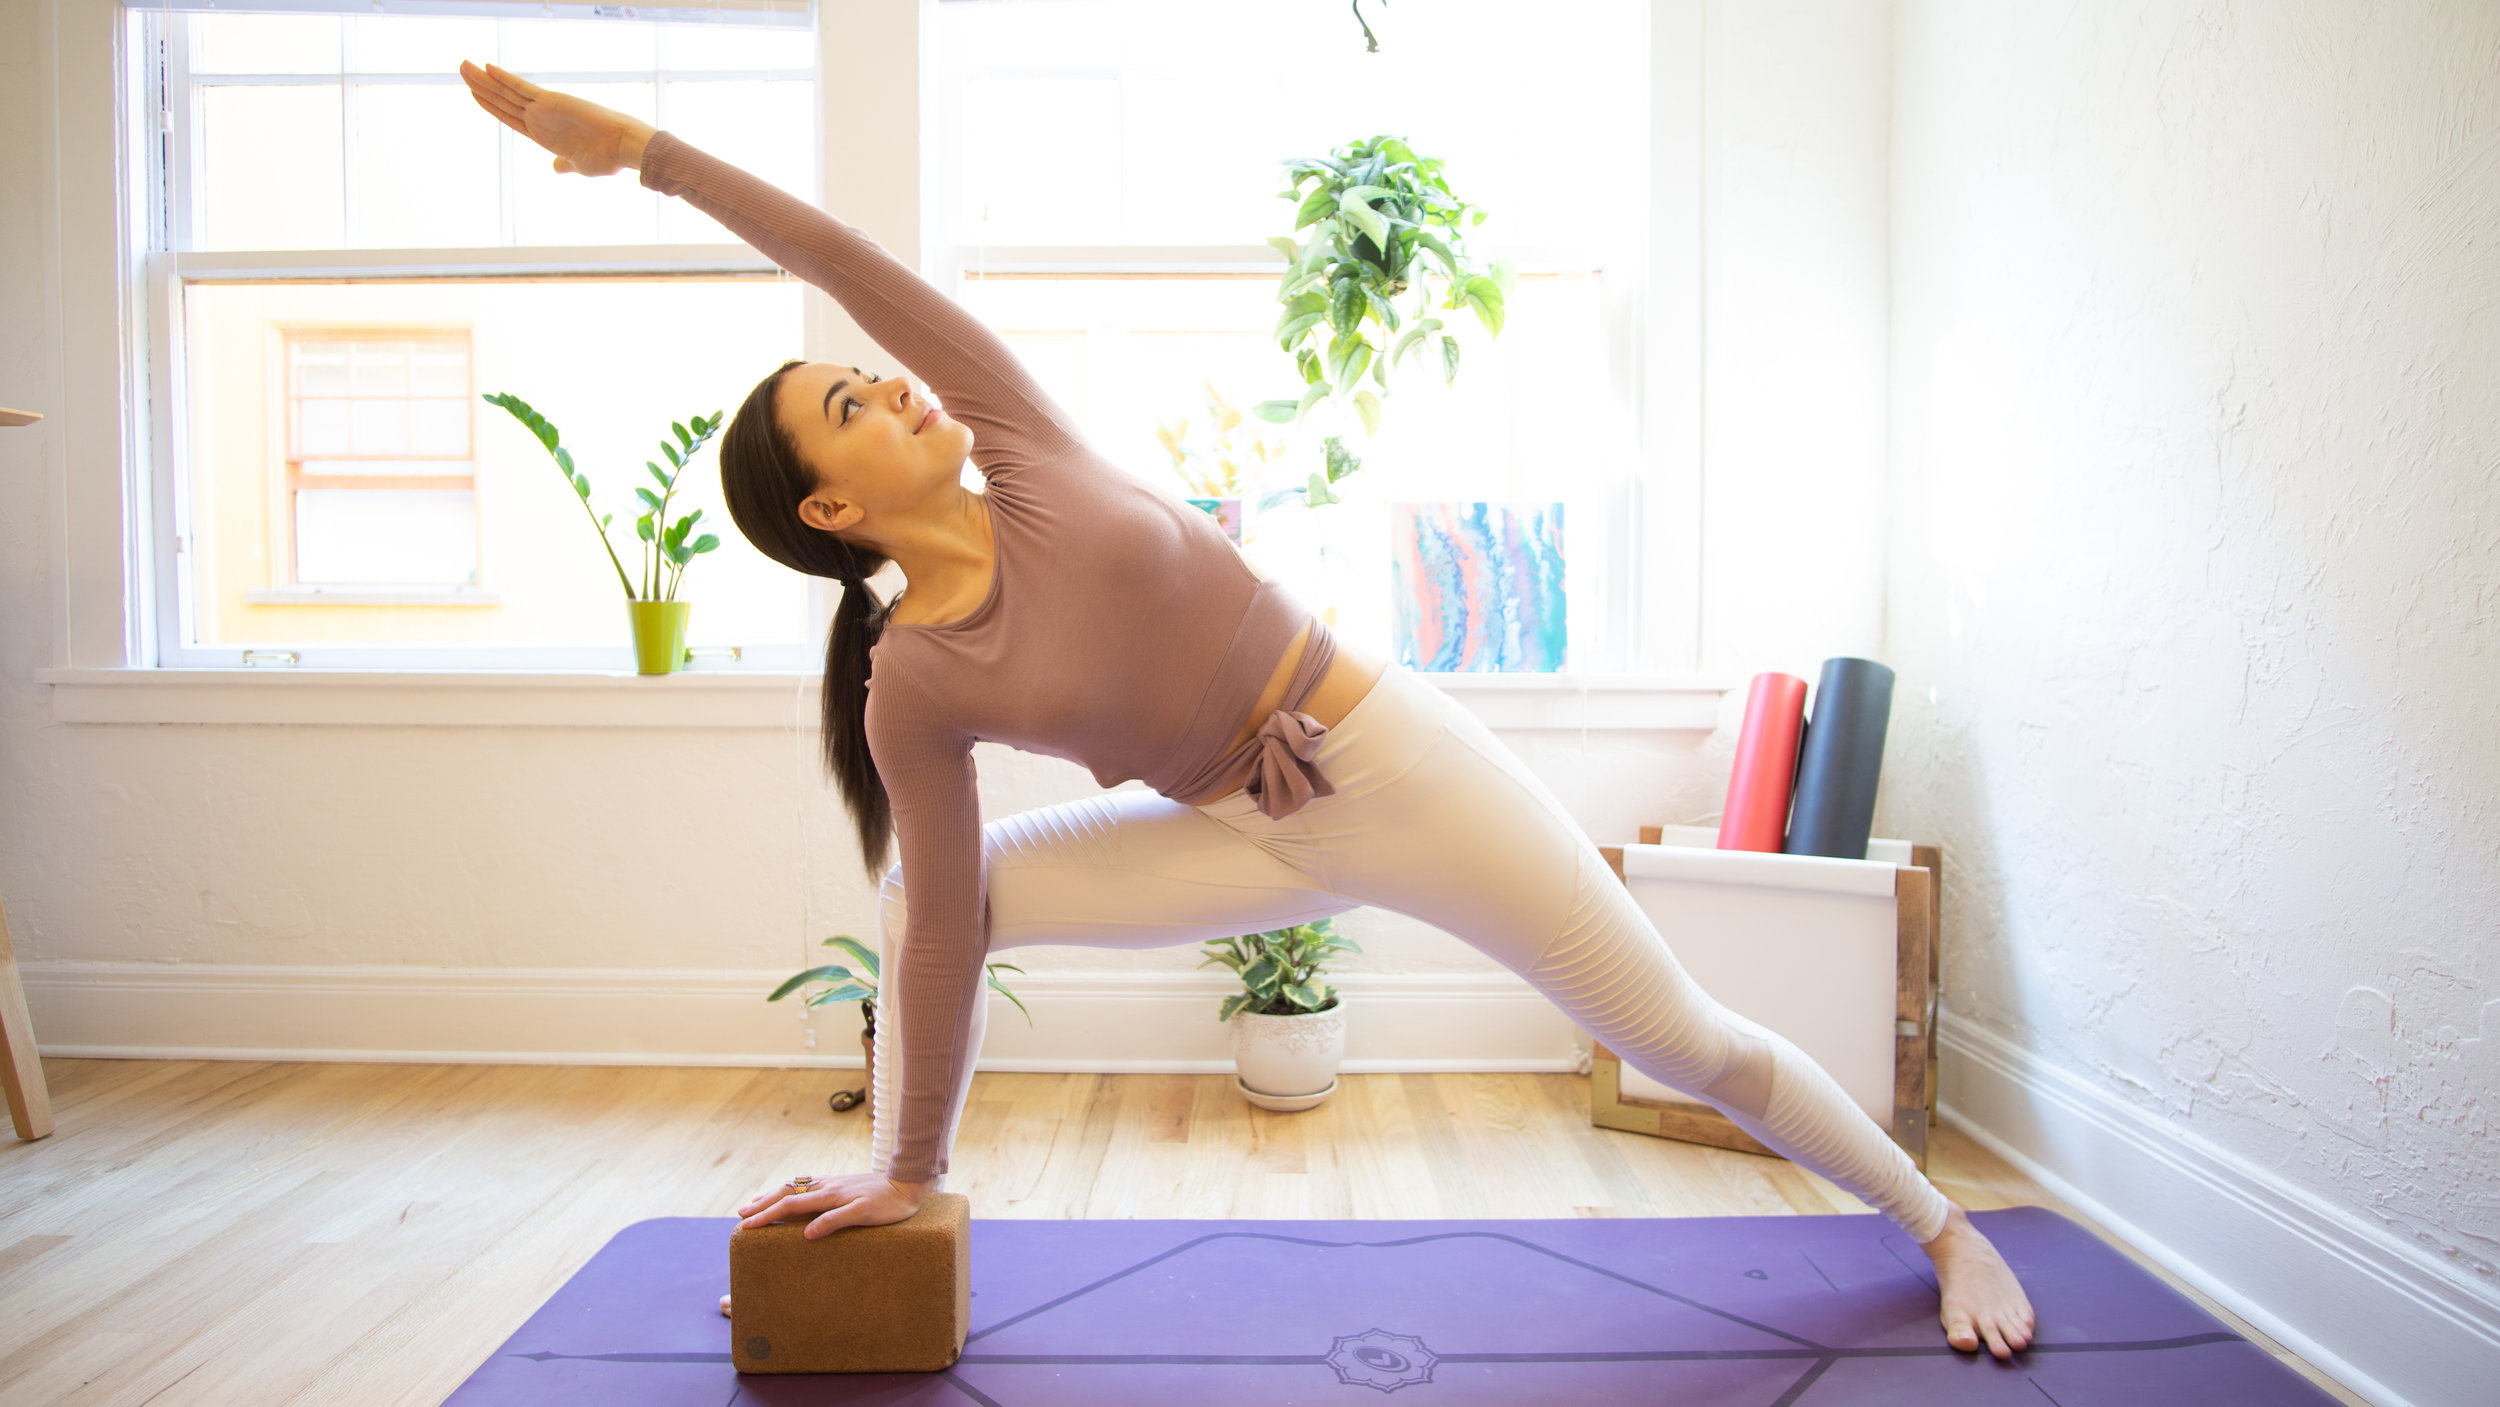
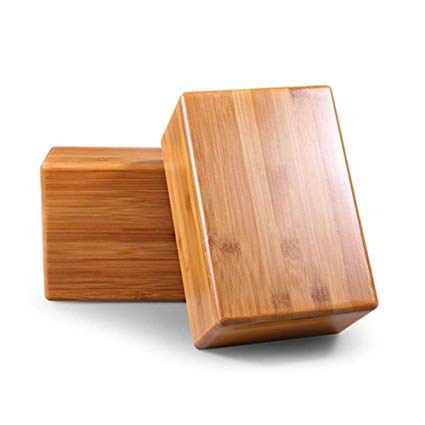
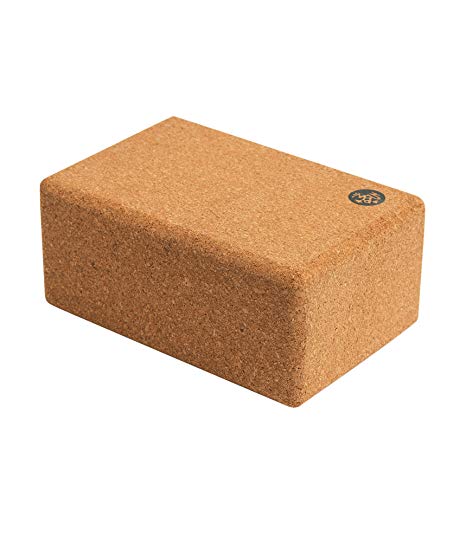
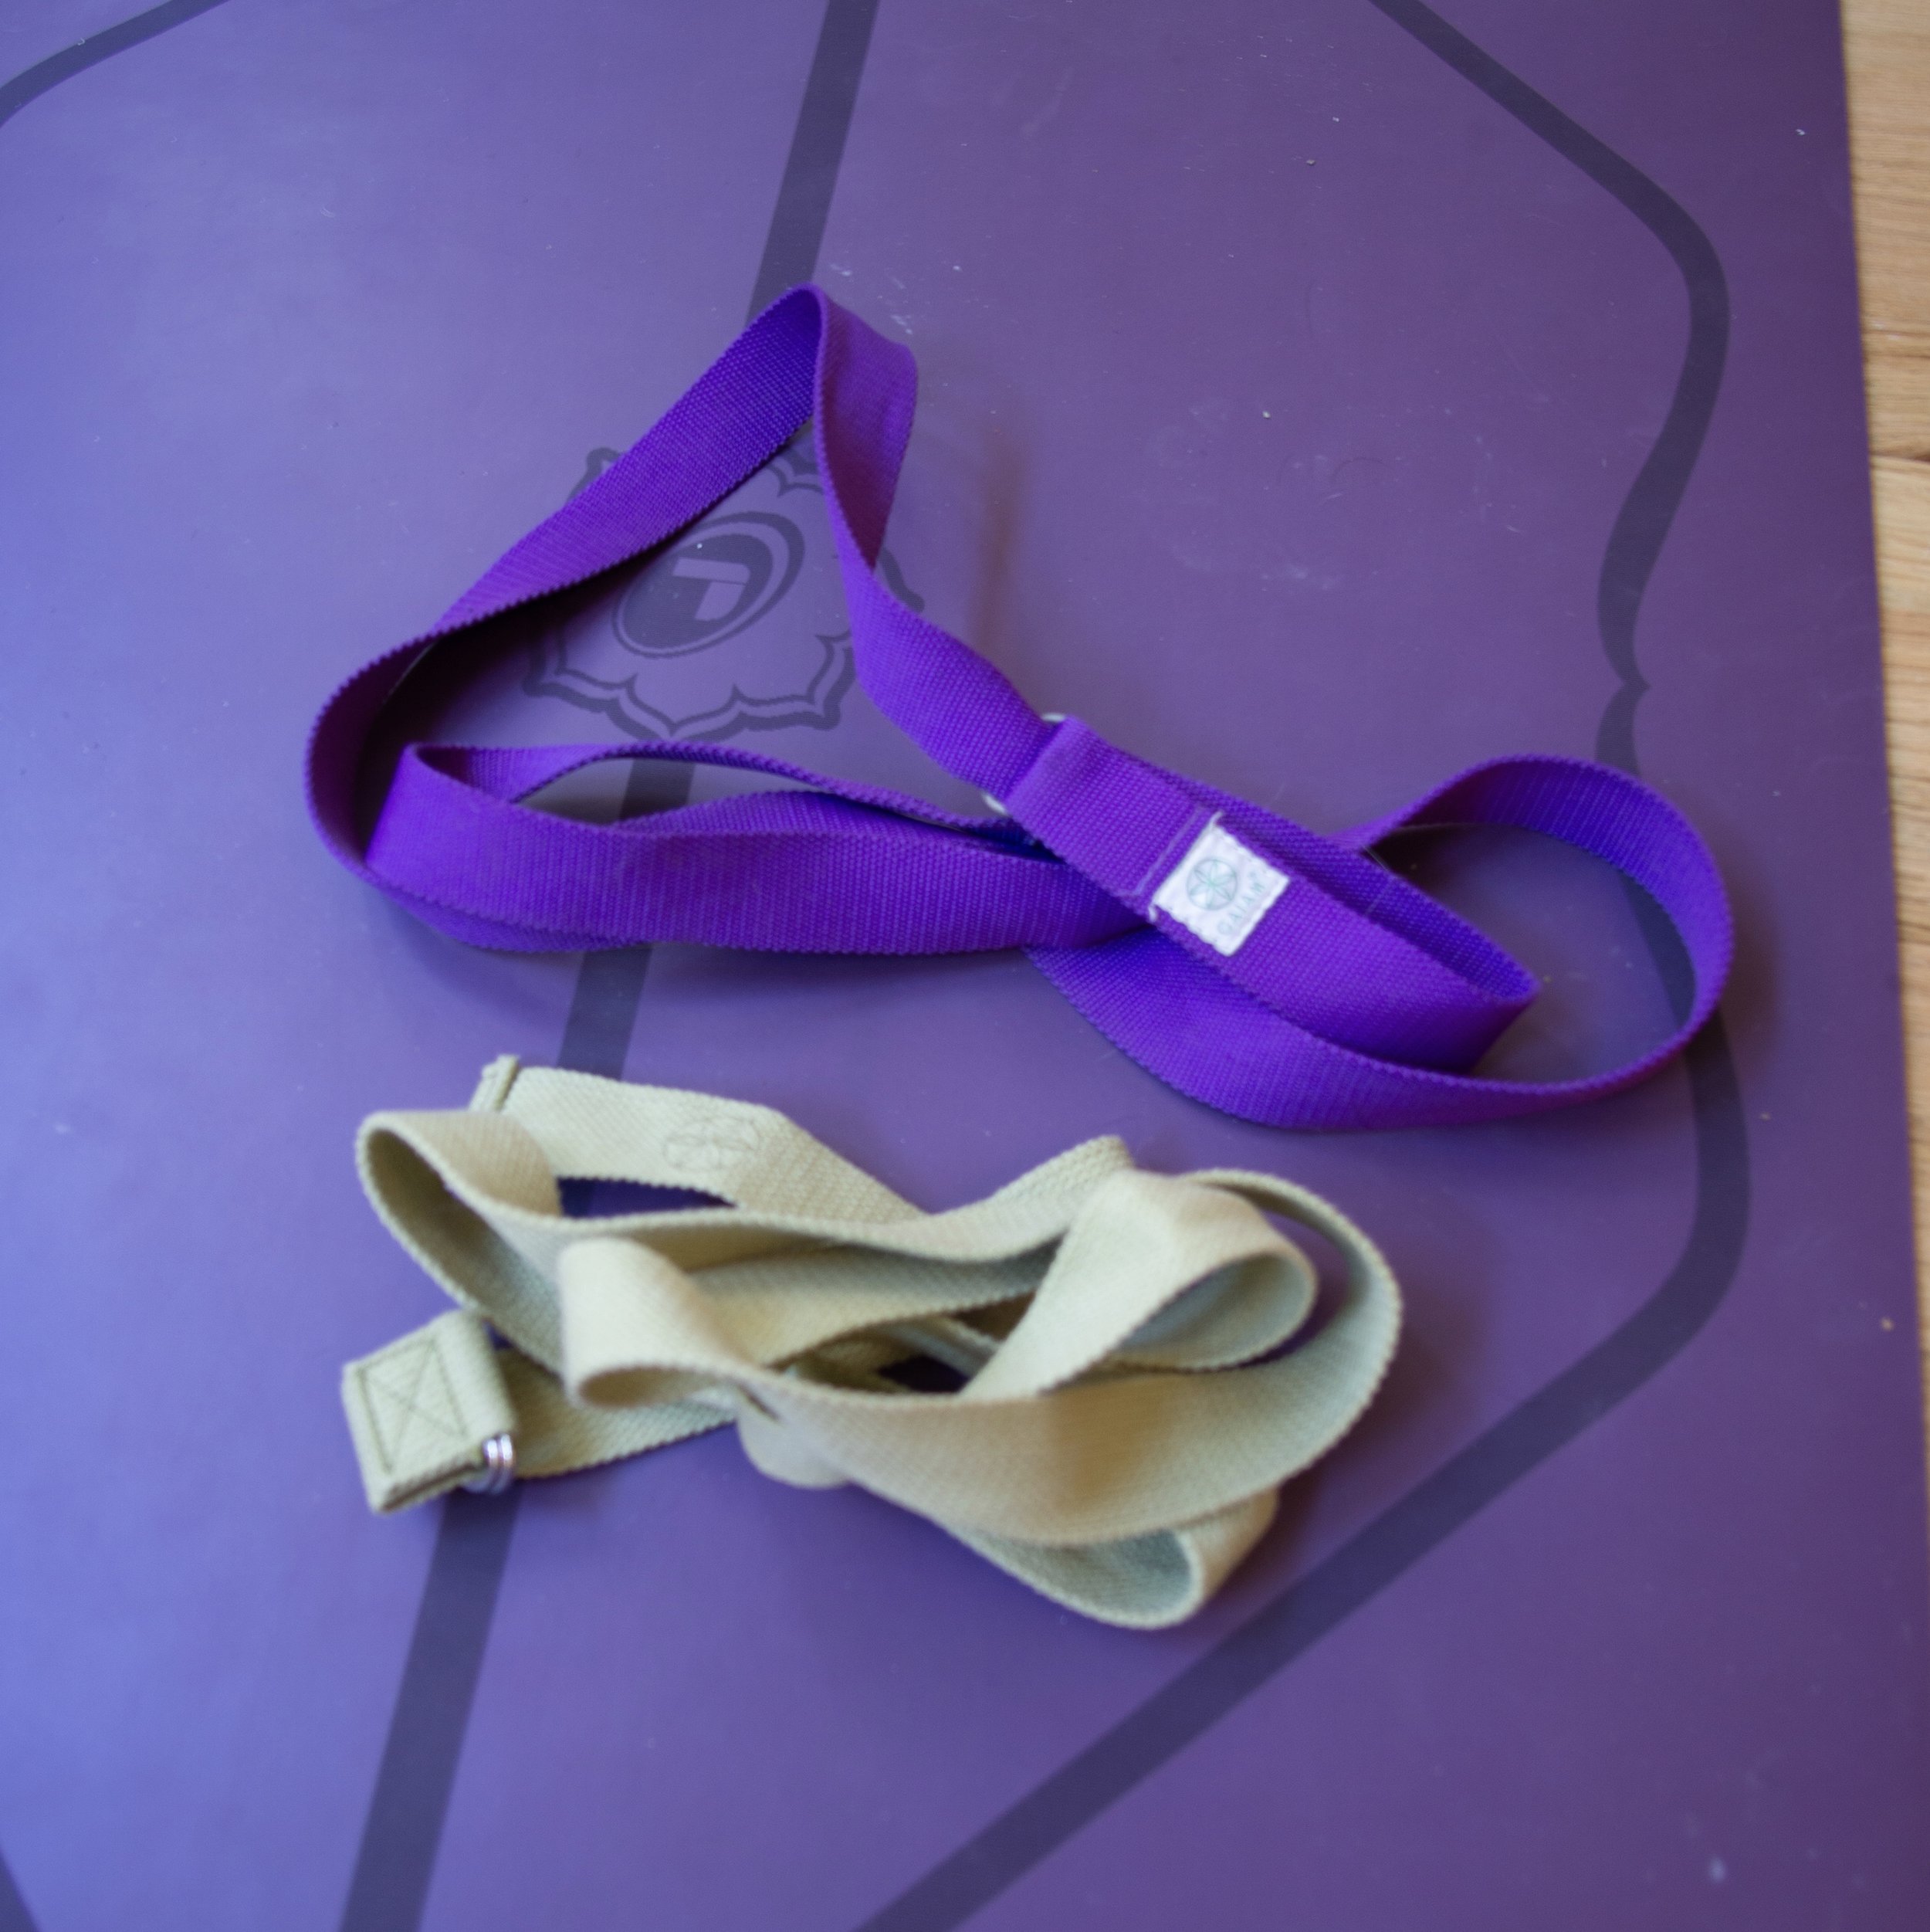
  • Step 3: Invest in some yoga props. Here are some I recommend: blocks, straps, bolster and a blanket — but before you rush out and purchase any of these, I’d say wait and see if this home practice is really something you’re going to be doing consistently. These are all nice tools to have, but chances are you have items that would work just as well in your home already. For a bolster, you can pile a couple of pillows on top of each other or roll up a blanket or towel. Stacked books work as yoga blocks, and a scarf or belt can be used in place of a yoga strap. Decide first, if it’s worth investing in props and go from there.

  • Step 4: Keep it clean and organized. If you keep your space nice and neat, you’ll be more likely to use it. Eliminate clutter, putting all unnecessary stuff where it belongs. An uncluttered space promotes an uncluttered mind. I try to put everything that I use away, even if I know I’m going to get them all out again the next day. I see it as a similar routine to making the bed, and it only takes a minute! You can store your stuff in an ottoman, a small shelf/cupboard or even a decorative basket. I repurposed a magazine holder to keep my yoga mats and straps all in one place and I actually like the way it looks with everything tucked away in a corner.

  • Step 5: Decorate the space. Lastly, make it a place where you want to spend time in. This area should inspire you to get on the mat, even on those days you’d rather be scrolling through IG under the covers. There are many things you can add to your yoga space to make it more calming and inviting; plants, a beautiful tapestry, incense or crystals. Or it might mean no extra objects at all — a sparse, minimalist space might be more your style.

And finally… you get to use the space! Practice yoga, meditate, read, make art, use the time spent here to connect deeply with yourself.

Do you practice yoga at home? If so, what are your tips for creating a peaceful and inspiring yoga space?

Want to receive a FREE home yoga space + prop guide?

Fill out the form below.

How To Choose The Right Yoga Props - Tips and Recommendations


If you’re new to yoga, figuring out what specific props to purchase might seem tricky or a little overwhelming. That’s why I’ve created this blog post — to help narrow down options and give you some tips! You might be thinking, why do I need yoga props anyway? Props are useful for every practitioner at all skill levels. They make postures more easily accessible and can add a whole new dimension to your yoga practice.

I’d recommend sticking with the basics before investing in anything expensive. Also, be sure to check around your house for items you can use as dupes! For example, you can substitute a yoga strap for a belt or scarf, some hardcover books for blocks, a pillow for a bolster, etc.

When looking for props, you should consider a few different factors: your personal needs, especially in regards to the type of yoga you practice and physical aspects of the props like size, material, texture and thickness. In this article we’ll cover what to look for in choosing yoga mats, blocks and straps. Keep reading to learn more!

Mats

There are some who would argue that you don’t need any props to practice yoga — not even a yoga mat —simply your body and breath will do. To a certain extent, this is true. Yoga props aren’t a necessity for a fulfilling practice. I personally love stretching barefoot on grass outdoors. But there are still a few reasons why I choose to use a yoga mat: it’s more hygienic, allows for better grip and stability, provides some cushion and comfort for your joints and often times, yoga mats can be extremely helpful for alignment.

Choosing a yoga mat doesn’t have to be hard! Here are my top tips:

Tip 1: Consider the type of yoga you will be practicing.

Vinyasa or flow yoga classes incorporate more movement, so you’ll need a mat with more traction or grip to keep your body feeling stable and well supported while you practice. For yin or restorative yoga, however, you’ll primarily be sitting on the ground, so grip is less important. Instead, opt for a soft, cushy mat. Hot yoga, Bikram, or Power yoga classes are typically performed in a heated room. If you’re doing these type of practices you will want to choose a mat specifically designed to keep you from slipping when sweat gets on your mat. It might help to do some more research on your own about different styles of yoga and what mat works best with each one.

Tip 2: Consider where you’re practicing yoga.

If you intend to practice at home then you don’t necessarily need to worry about purchasing a lightweight mat you can transport easily. However, if you decide to take yoga classes at a studio or outside of your home, it might be smart to purchase a mat you can carry around easily. You might also want to look into a lighter weight mat if you travel a lot or do yoga when on the road. Keep in mind that you will sacrifice some cushioning with a travel mat. Consider investing in a second yoga mat that you can bring on trips or even practice outdoors.

I like these Travel Mats from Liforme.

Tip 3: Consider material and texture.

  • Be cautious of PVC mats. Polyvinyl Chloride, otherwise known as vinyl, is one of the most commonly used materials to make yoga mats. However, some studies indicate it may be a carcinogen and it’s also difficult to recycle. So if you’re a health-conscious person, you may want to avoid a PVC mat.

  • Newer, more eco-friendly options include natural and recycled rubber, jute and organic or natural cotton (which means the fabric isn’t treated with synthetic finishes during manufacturing.)

  • Choose the appropriate thickness. A thicker mat can be more comfortable for seated poses, but you’ll want a thinner mat for standing poses and especially for balancing poses. A standard yoga mat is about 1/8 inch thick, while the thickest are about 1/4 inch.

  • Choose the appropriate stickiness. A sticky yoga mat keeps you from sliding and helps you maintain alignment as you move from one pose to another. Non-slip mats, are designed to with extra grip and stick which might come in handy if you’re doing a rigorous form of yoga.

My personal favorite mats to practice on, and the ones I always recommend are the Liforme mats. They are PVC free, biodegradable, super grippy, sweat-proof and have engraved alignments to help you with your form in postures.


You can shop them by clicking here.

Use code ‘JESSICARICHBURG’ for a 10% discount on all of their online products! You can thank me later ;)

Blocks

untitled-17.JPG

No matter what type of yoga you do or where you practice, yoga blocks are among the most versatile pieces of yoga equipment you can use. Yoga blocks help us maintain anatomical integrity in the postures and they can help advance your practice whether you’re a beginner or seasoned practitioner. Placing your hand on a block in standing postures such as Parsvakonasana (Side Angle) can make the difference between a pose that feels strained and uncomfortable, and a pose that feels free and graceful.

If yoga is about steadying the mind and body, then breathing freely and feeling a sense of ease in the postures is essential to practice. Here are my top tips for choosing a yoga block:

Tip 1: Consider the material and price.

Originally yoga blocks were made of wood, but now blocks also come in both cork and foam. Let’s explore the pros and cons of all three:

  • Wooden yoga blocks, like these from Wooden Life, are often made of bamboo and are the most durable and expensive option. Wooden blocks are comparatively hard and heavy (they usually weigh between 1.5-2.5 pounds) but are very sturdy, more aesthetically pleasing and will last forever. The downsides to wooden blocks are that they’re expensive (starting around $18), can get slippery due to sweat and they’re not ideal for travel. Wood blocks are ideal for those who prefer natural products and will use them mostly for balance.

  • Cork yoga blocks can be more eco-friendly than wooden ones (depending on how the wood and cork is harvested) and cork blocks are softer and usually weigh less than wood (between 1-2 pounds.) They’re also a little less expensive (starting around $15 each). The downside to cork blocks is that they absorb sweat easily which may cause the edges and corners to break down slightly. I personally like these cork blocks from Manduka and can confidently say they have helped transformed my practice!

  • Foam yoga blocks are the most common type and are less expensive than cork and wood (starting around $8 each.) They are more lightweight (weighing between 3-12 ounces) making them ideal to travel with and are very soft. The downsides to foam blocks are that foam can get dirty and wear easily, and they aren’t as eco-friendly as wood or cork. At times, they can also feel flimsy or less stable when used for support, so I suggest looking into high density foam blocks like these from REEHUT.

Tip 2: Consider purchasing more than one yoga block.

Often you will only need one yoga block, but there’s a good chance that you’d regret not buying two. There are a few advantages of purchasing two blocks at once. First being that you will have a matching set and won’t need to remember the size, brand and color later on. Second, you may often find that having a block in each hand or stacked blocks will offer more support which will lead to a wider range of poses you can attempt during your practice. It’s easy to find a set of two and often it isn’t much more expensive than just buying one! The standard size yoga block is 4 inches x 6 inches x 9 inches, though other sizes are also available.

Straps

Yoga straps can also be used to enhance and deepen your yoga practice. Often straps are used as an extension of the arm to help with twisting and stretching postures. In theory, all yoga straps are somewhat similar to each other, but there are subtle differences that you should take into account before making a purchase.

Tip 1: Consider size and material.

  • The length of the yoga strap is the first thing to look into. Since you will mostly be using the prop in a loop, you need to ensure that you have enough strap length to hold onto it comfortably. The most common yoga strap sizes are 6 and 8 ft long. However, taller practitioners can benefit more from a longer size such as 10ft. Check out these yoga straps from REEHUT which come in all 3 sizes!

  • Most straps are made with cotton which provides a good grip and allows for easy cleaning, but straps made from other natural materials are great as well. Ultimately, it comes down to personal preference.

Tip 2: Consider closure and design.

  • Buckles. Yoga straps with a buckle will give you the most options during your yoga practice. You can create a loop with the strap and regulate its width to match your posture and flexibility.

  • Loops. Yoga straps with loops are generally less fussy to use compared to those with a buckle. This Infinity strap, for example, allows a smooth transition between your postures without the need to adjust the strap for every movement. A strap with a sliding loop design like this one from Clever Yoga can easily be used as both a strap and a yoga mat carrier if you want to avoid additional expenses.


Other helpful props to consider and research on your own: